A dedicated 7 Days to Die server keeps the world running between sessions and stops one player's PC from being the lag source for everyone's blood moon. This guide installs it with SteamCMD on a VPS in about 30 minutes, and adds two things most guides leave out: a shutdown that saves, and a size that fits the game.
Using an AI coding agent? There's a ready-made prompt at the end of this guide.
The honest bit first: this game wants RAM and fast cores
Community guides put the floor at 6 to 8 GB of RAM, and 10 to 16 GB for a full group, mods, or a big map. The game leans on single-thread speed more than core count, so a couple of fast cores beat many slow ones.
We recommend Comet (8 GB) for a small group on a default-size random world, and Pulsar (16 GB) for 8 or more players, mods, or a larger map. Orbit (4 GB) is too small, and we won't pretend otherwise.
Generating a random world is a one-off memory spike that grows steeply with map size. So we use the default size and add swap as a safety net.
What you'll need
- A PrivateByte VPS: Comet ($15.99/mo: 4 vCPU, 8 GB RAM, 100 GB SSD), or Pulsar ($27.99/mo: 6 vCPU, 16 GB) for bigger groups or mods.
- 7 Days to Die on Steam for everyone joining. The server needs no game licence.
- About 30 minutes, mostly downloading and generating the world.
Step 1: Deploy your VPS
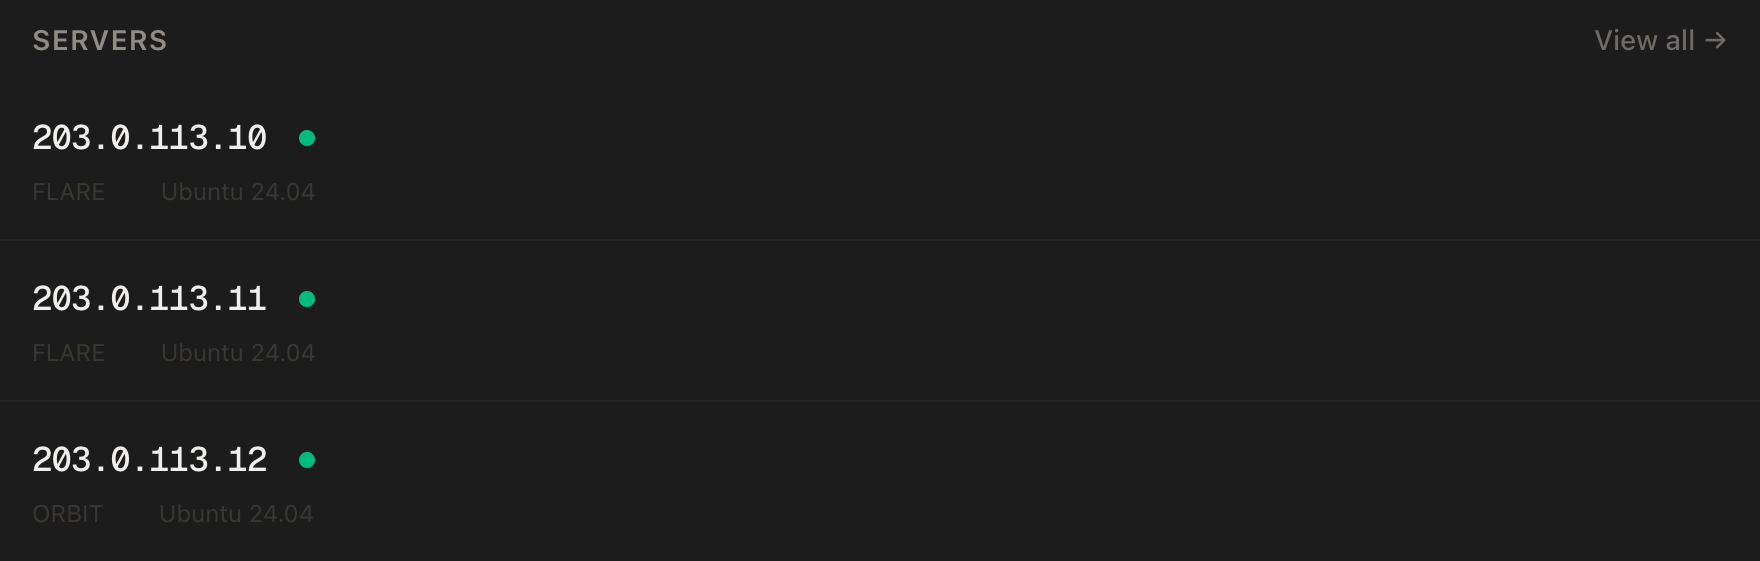
In the PrivateByte dashboard, open the store, choose Comet, pick Ubuntu 24.04 and the region closest to your players, and deploy.
Step 2: Connect, firewall, SteamCMD
ssh root@YOUR_SERVER_IP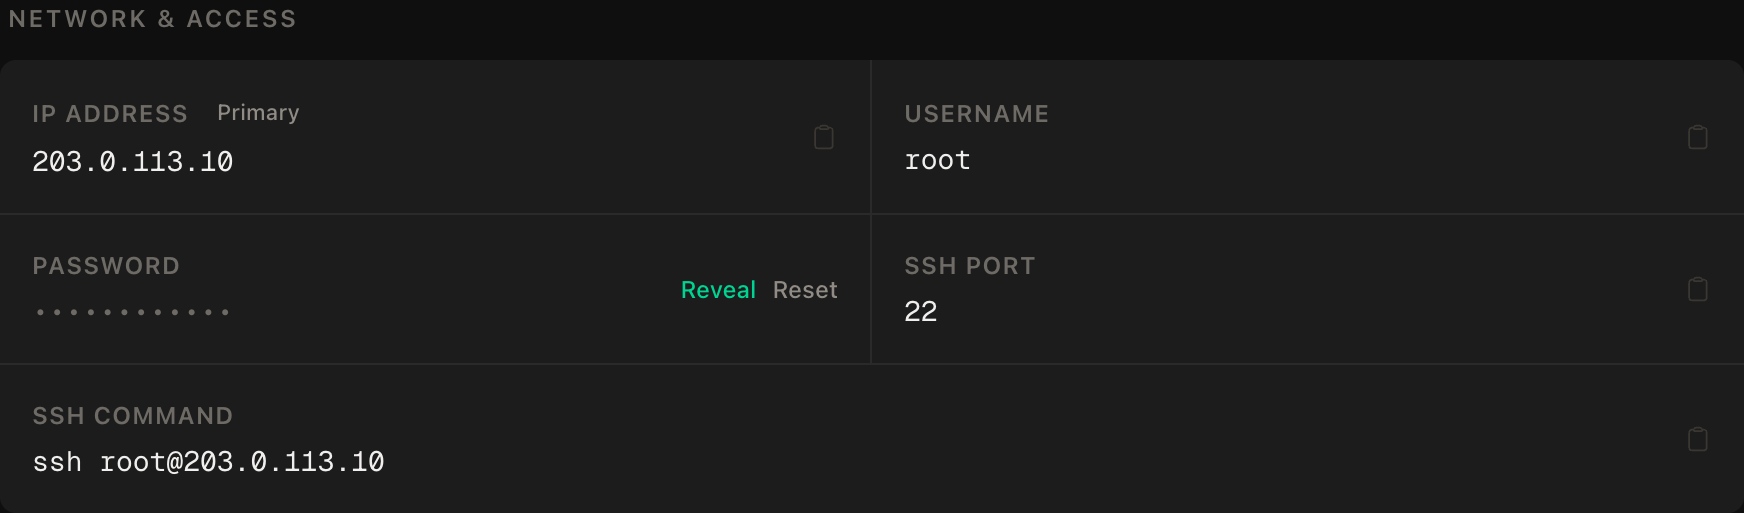
ssh command.SSH first, then the game ports, then enable:
apt update && apt upgrade -y
ufw allow OpenSSH
ufw allow 26900/tcp
ufw allow 26900:26903/udp
ufw --force enable
Port 26900 needs TCP and UDP; 26901 to 26903 are UDP. We deliberately do not open telnet (8081) or the web dashboard (8080). Those are admin doors.
Add swap for the world-generation spike:
fallocate -l 4G /swapfile
chmod 600 /swapfile
mkswap /swapfile && swapon /swapfile
echo '/swapfile none swap sw 0 0' >> /etc/fstab
Now SteamCMD, Valve's command-line installer. It's 32-bit, so Ubuntu needs i386 first:
add-apt-repository -y multiverse
dpkg --add-architecture i386
apt update
apt install -y steamcmd
The install shows Steam's licence agreement. Read and accept it yourself. Then create the user the server runs as:
adduser --disabled-password --gecos "" sdtdStep 3: Install the server
su - sdtd
/usr/games/steamcmd +force_install_dir /home/sdtd/server +login anonymous +app_update 294420 validate +quit
294420 is the dedicated server tool, a different app from the game itself (251570). It's a several-GB download.
Step 4: serverconfig.xml essentials
Never edit the shipped serverconfig.xml. Updates overwrite it. Work on a copy:
cp ~/server/serverconfig.xml ~/myserver.xml
nano ~/myserver.xml
Set these properties (add any that are missing):
<property name="ServerName" value="Our Apocalypse"/>
<property name="ServerPassword" value="CHANGE_ME_join_password"/>
<property name="ServerVisibility" value="0"/>
<property name="ServerMaxPlayerCount" value="8"/>
<property name="GameWorld" value="RWG"/>
<property name="WorldGenSeed" value="ourseed"/>
<property name="WorldGenSize" value="6144"/>
<property name="GameName" value="OurSave"/>
<property name="TelnetEnabled" value="true"/>
<property name="TelnetPort" value="8081"/>
<property name="TelnetPassword" value="CHANGE_ME_telnet_password"/>
<property name="WebDashboardEnabled" value="false"/>
<property name="UserDataFolder" value="/home/sdtd/data"/>
What earns an explanation:
ServerVisibility:2public,1friends only,0unlisted. Unlisted plus a password means you join by IP.GameWorld=RWGgenerates a random world fromWorldGenSeedandWorldGenSizeon first start. The defaultNavezganeis the fixed hand-made map. Size must be a multiple of 2048; bigger sizes cost much more memory and time.GameNamenames the save. Change it later and you start a new world; the old one stays on disk.- Telnet is on by default. With an empty password it only listens locally; with a password it listens on every interface. We need the password for the shutdown script, and the firewall keeps 8081 shut. Use a different password from the join one.
UserDataFolderpins where saves live, so the backup path below is not a guess.
Blood moon and day length are in the same file. These are the shipped defaults:
<property name="DayNightLength" value="60"/>
<property name="DayLightLength" value="18"/>
<property name="BloodMoonFrequency" value="7"/>
<property name="BloodMoonRange" value="0"/>
<property name="BloodMoonWarning" value="8"/>
<property name="BloodMoonEnemyCount" value="8"/>
DayNightLength is real minutes per in-game day, DayLightLength is hours of daylight out of 24, and BloodMoonFrequency is in-game days between blood moons (0 turns them off). BloodMoonRange randomises the day by that many days either side. BloodMoonEnemyCount is zombies allowed at once per player during the horde, so on a small box it is your first performance lever.
Easy Anti-Cheat (EACEnabled) is on by default. Leave it on for vanilla; most mods need it off.
Step 5: Set up a safe shutdown
The server saves on the telnet shutdown command. Killing the process instead is how you lose an evening. Two small scripts, as root:
nano /usr/local/bin/sdtd-cmd#!/bin/bash
# usage: sdtd-cmd "console command"
exec 3<>/dev/tcp/127.0.0.1/8081
sleep 2
printf '%s\r\n' "$(cat /home/sdtd/telnet.pass)" >&3
sleep 2
printf '%s\r\n' "$1" >&3
sleep 3
exec 3>&-nano /usr/local/bin/sdtd-stop#!/bin/bash
/usr/local/bin/sdtd-cmd shutdown
for i in $(seq 1 120); do
pgrep -u sdtd -f '[7]DaysToDieServer.x86_64' >/dev/null || exit 0
sleep 1
done
exit 0Store the telnet password (same value as TelnetPassword) where only sdtd can read it:
chmod 755 /usr/local/bin/sdtd-cmd /usr/local/bin/sdtd-stop
read -rs -p "Telnet password: " P; echo
printf '%s' "$P" > /home/sdtd/telnet.pass; unset P
chown sdtd:sdtd /home/sdtd/telnet.pass && chmod 600 /home/sdtd/telnet.pass
The [7] in the pgrep pattern stops it matching its own command line and waiting forever.
Step 6: Hand it to systemd
nano /etc/systemd/system/sdtd.service[Unit]
Description=7 Days to Die server
After=network-online.target
Wants=network-online.target
[Service]
User=sdtd
WorkingDirectory=/home/sdtd/server
ExecStart=/home/sdtd/server/7DaysToDieServer.x86_64 -logfile /home/sdtd/server/output_log.txt -quit -batchmode -nographics -dedicated -configfile=/home/sdtd/myserver.xml
ExecStop=/usr/local/bin/sdtd-stop
TimeoutStopSec=180
Restart=on-failure
[Install]
WantedBy=multi-user.targetsystemctl daemon-reload
systemctl enable --now sdtd
tail -f /home/sdtd/server/output_log.txtThe first start generates the world: roughly 5 to 15 minutes on the default size, longer for bigger maps. Watch the log until it settles (look for GameServer.Init successful), then press Ctrl+C. The server keeps running.
On shutdown, systemd runs sdtd-stop, which sends shutdown and waits up to two minutes for exit. Without that, a reboot is a crash.
Step 7: Connect
In 7 Days to Die, choose Join a Game, then Connect to IP. Enter the server IP, port 26900, and the join password. Every player must be on the same game branch as the server (stable by default).
Verify it works
You can join. Connect and place a chest.
It saves on restart, the check that matters. systemctl restart sdtd, wait a couple of minutes, rejoin. The chest must still be there. journalctl -u sdtd confirms sdtd-stop ran.
Saves are where you think. ls /home/sdtd/data/Saves should show your world. The startup log line GamePref.SaveGameFolder shows what the server believes.
The negative control. From your own machine:
nc -zv -w 5 YOUR_SERVER_IP 8081This should fail: telnet must not be reachable from the internet. The same command against port 22 should succeed, proving the probe works.
It survives a reboot. reboot, wait, rejoin.
Backups
Everything worth keeping is under /home/sdtd/data. PrivateByte's daily server backups include it, but a game-aware copy is better. Save through telnet, then archive:
nano /usr/local/bin/sdtd-backup#!/bin/bash
/usr/local/bin/sdtd-cmd saveworld
sleep 15
mkdir -p /home/sdtd/backups
tar -czf /home/sdtd/backups/sdtd-$(date +%F-%H%M).tar.gz -C /home/sdtd data
find /home/sdtd/backups -name 'sdtd-*.tar.gz' -mtime +7 -deletechmod 755 /usr/local/bin/sdtd-backupThen add the schedule for the sdtd user with crontab -u sdtd -e:
0 4 * * * /usr/local/bin/sdtd-backupA backup you have never restored is a hope. Once, on a quiet evening: stop the service, move data aside, extract an archive, start, and confirm the world loads.
Updates
Client and server must match. Update when the game does:
systemctl stop sdtd
su - sdtd -c "/usr/games/steamcmd +force_install_dir /home/sdtd/server +login anonymous +app_info_update 1 +app_update 294420 validate +quit"
systemctl start sdtd
+app_info_update 1 matters: without it SteamCMD can report success while keeping the old build.
Stable is the default. For experimental or older builds, add -beta <branch> after +app_update 294420 (for example -beta latest_experimental); older versions exist as named branches on Steam. A client on one branch cannot join a server on another. Experimental builds can change save layout, so copy data first.
Troubleshooting
"Incompatible version". Server and client are on different builds. Update the server, or move the client to the same branch.
Nobody can connect. ufw status must show 26900/tcp and 26900:26903/udp.
Killed or restarting during world generation. Out of memory. Check free -m and dmesg | grep -i kill. Use the default WorldGenSize, keep the swap, or move to Pulsar.
Lag, especially during blood moons. Lower BloodMoonEnemyCount and MaxSpawnedZombies, and check top for one pinned core. More cores will not fix it; fewer zombies will.
The world reset. You changed GameName or UserDataFolder, so the server started a new save. Set them back and restart; the old files never moved.
Telnet script does nothing. Check telnet.pass matches TelnetPassword exactly and TelnetEnabled is true.
Do it with an AI agent
If you'd rather hand this to Claude Code, Cursor, or another coding agent, don't paste the article at it; agents skim warnings and lose ordering. Copy this instead, and run it from your own machine with your agent able to SSH out.
Prompt for an AI agent
Set up a 7 Days to Die dedicated server on a fresh Ubuntu 24.04 VPS with
SteamCMD, running as an unprivileged user under systemd, unlisted and
password-gated, with a telnet-based safe shutdown and a backup job.

FILL IN BEFORE YOU START:
- SERVER_IP   = <VPS IP from the PrivateByte dashboard>
- SERVER_NAME = <display name>
- GAME_NAME   = <save name; treat as permanent, changing it starts a NEW world>
- The join password and the telnet password are MINE. You never see them.

WHAT TO DO:
1. SSH to root@SERVER_IP. Confirm Ubuntu 24.04, run "free -m", tell me the RAM.
   If under 8 GB, warn me (6-8 GB minimum; world generation can be OOM-killed)
   and WAIT for my decision.
2. apt update && apt upgrade -y.
3. Firewall, in THIS EXACT ORDER: ufw allow OpenSSH; ufw allow 26900/tcp;
   ufw allow 26900:26903/udp; ufw --force enable.
4. Add 4 GB swap (/swapfile, chmod 600, fstab entry) if none exists.
5. add-apt-repository -y multiverse; dpkg --add-architecture i386; apt update.
   Then STOP and tell me to run "apt install -y steamcmd" myself (it shows
   Steam's licence agreement; accepting it is mine). WAIT.
6. adduser --disabled-password --gecos "" sdtd (no sudo).
7. As sdtd: /usr/games/steamcmd +force_install_dir /home/sdtd/server
   +login anonymous +app_update 294420 validate +quit
8. As sdtd: cp ~/server/serverconfig.xml ~/myserver.xml (never edit the
   shipped file). In myserver.xml set ServerName, ServerVisibility=0,
   ServerMaxPlayerCount=8, GameWorld=RWG, WorldGenSize=6144, GameName,
   TelnetEnabled=true, TelnetPort=8081, WebDashboardEnabled=false,
   UserDataFolder=/home/sdtd/data. Leave ServerPassword and TelnetPassword for
   me: STOP and tell me to type both into the file myself (different values),
   and to write the telnet password into /home/sdtd/telnet.pass (owner sdtd,
   chmod 600). WAIT for my confirmation.
9. Create /usr/local/bin/sdtd-cmd (bash, opens /dev/tcp/127.0.0.1/8081, sends
   the password read from /home/sdtd/telnet.pass, then the command) and
   /usr/local/bin/sdtd-stop (runs sdtd-cmd shutdown, then waits up to 120 s
   with pgrep -u sdtd -f '[7]DaysToDieServer.x86_64'). chmod 755.
10. /etc/systemd/system/sdtd.service: User=sdtd,
    WorkingDirectory=/home/sdtd/server, ExecStart=/home/sdtd/server/7DaysToDieServer.x86_64
    -logfile /home/sdtd/server/output_log.txt -quit -batchmode -nographics
    -dedicated -configfile=/home/sdtd/myserver.xml,
    ExecStop=/usr/local/bin/sdtd-stop, TimeoutStopSec=180,
    Restart=on-failure. daemon-reload, enable --now.
11. Create /usr/local/bin/sdtd-backup (sdtd-cmd saveworld, sleep 15, tar
    /home/sdtd/data to /home/sdtd/backups, delete archives older than 7 days)
    and a 04:00 cron entry for the sdtd user.

RULES:
- Never read, print or log either password, myserver.xml's password lines, or
  telnet.pass. To check they are set, check they are non-empty.
- Never open 8080 or 8081. Never run the server as root.
- Do not shorten the sdtd-stop wait; it is what lets the world save.
- If /home/sdtd/data already exists, STOP and ask; that directory is the save.

VERIFY, AND SHOW ME THE OUTPUT OF EACH:
- "systemctl status sdtd" -> active, after the first world generation finishes
  (tail /home/sdtd/server/output_log.txt; wait for it)
- "ls /home/sdtd/data/Saves" -> the world exists
- "ufw status" -> OpenSSH, 26900/tcp, 26900:26903/udp only
- THE NEGATIVE CONTROL, from MY machine: "nc -zv -w 5 SERVER_IP 8081" MUST
  fail and "nc -zv -w 5 SERVER_IP 22" MUST succeed.
- I join at SERVER_IP:26900 and place a chest; "systemctl restart sdtd"; I
  rejoin and confirm the chest survived.
- "/usr/local/bin/sdtd-backup" run once by hand as sdtd -> a .tar.gz appears
  in /home/sdtd/backups
- reboot, wait 3 minutes, "systemctl status sdtd" -> active

Do not tell me a step succeeded without showing the output that proves it. If a
verification fails, stop and report the actual error. Do not retry silently or
improvise a workaround, especially around the firewall or /home/sdtd/data.
Worth stealing: the passwords and licence agreement are handed back to you, and the checks prove the outcome (the save survived a restart, telnet is closed from outside), not that a service says active.
Hosting more than one game? The same console-under-systemd pattern runs our Terraria guide. Project Zomboid is the other zombie survival server, Palworld is the memory-hungry one, Valheim is the Docker version, and the Minecraft guide covers the evergreen.
Deploy your VPS
The Comet plan is the honest starting size for a small group; Pulsar when the group or mod list grows.
- Unmetered bandwidth, no overage
- Free DDoS protection
- Daily automated backups
- Browser console access
Common questions
How much RAM does a 7 Days to Die server need? 6 to 8 GB minimum, 10 to 16 GB for a full group or mods. 8 GB (Comet) suits a small group; 16 GB (Pulsar) is the comfortable step up. 4 GB is too small.
Which ports does it use? 26900 TCP and UDP, plus UDP 26901 to 26903. Keep telnet (8081) and the web dashboard (8080) closed to the internet.
How do I make the blood moon less brutal, or turn it off?
Lower BloodMoonEnemyCount for smaller hordes, change BloodMoonFrequency (default 7 days), or set it to 0 to disable. Restart after editing.
Can I use mods?
Yes, but most need EACEnabled set to false, every player needs the same mods, and memory use rises. Take a backup first.
Where do I add admins?
Add your 64-bit Steam ID to serveradmin.xml in the server's user data folder, or use the telnet console. Restart to pick up file edits.