Self-hosting Nextcloud gives you the Google-suite core — file sync on every device, calendars, contacts, shared links, photos — on a server you own, with no per-user pricing and nobody scanning the contents. This guide uses Nextcloud's own All-in-One installer, which brings its own certificates and its own backup system, in about 30 minutes. It starts with three honest paragraphs most guides skip.
Using an AI coding agent? There's a ready-made prompt at the end of this guide. Copy that instead of this article.
Three things to know before you start
This guide breaks our usual pattern, deliberately. Our self-hosting articles normally put Caddy in front of everything. Nextcloud All-in-One (AIO) is the project's own orchestrator: it runs the database, cache, and web pieces as containers it manages itself, and it obtains and renews its own HTTPS certificates. Wedging a second proxy in front of a system designed to own ports 80 and 443 is the single most common way people end up debugging their install on a forum. So here, AIO gets the ports it asks for, and this server does one job.
AIO manages Docker itself — know what that means. The installer mounts the Docker control socket, which is how one command gives you a whole coordinated stack, automatic updates and integrated backups. It also means that container can do anything to Docker on this machine. On a dedicated server that's a reasonable trade, and it's the officially supported path — but it's a trade, and you should be making it on purpose. It's also one more argument for this box doing nothing else.
Sizing, honestly. Nextcloud's a suite, and the suite is heavy when fully dressed. Comet ($15.99/mo, 8 GB) runs it comfortably with the useful extras on. Orbit (4 GB) is fine if you skip the optional heavyweights — Office, Talk, the antivirus scanner — which the installer lets you untick. Flare will disappoint you here; this is not its workload. And the disk maths is the same conversation as our Immich guide: 100 GB is a generous working cloud for documents and sync, and the wrong tool for hoarding terabytes — that's a NAS.
What you'll need
- A PrivateByte VPS. We recommend Comet ($15.99/mo: 4 vCPU, 8 GB RAM, 100 GB SSD).
- A domain name you control the DNS for — genuinely required; AIO validates it before it will even start Nextcloud.
- About 30 minutes.
Step 1: Deploy your VPS
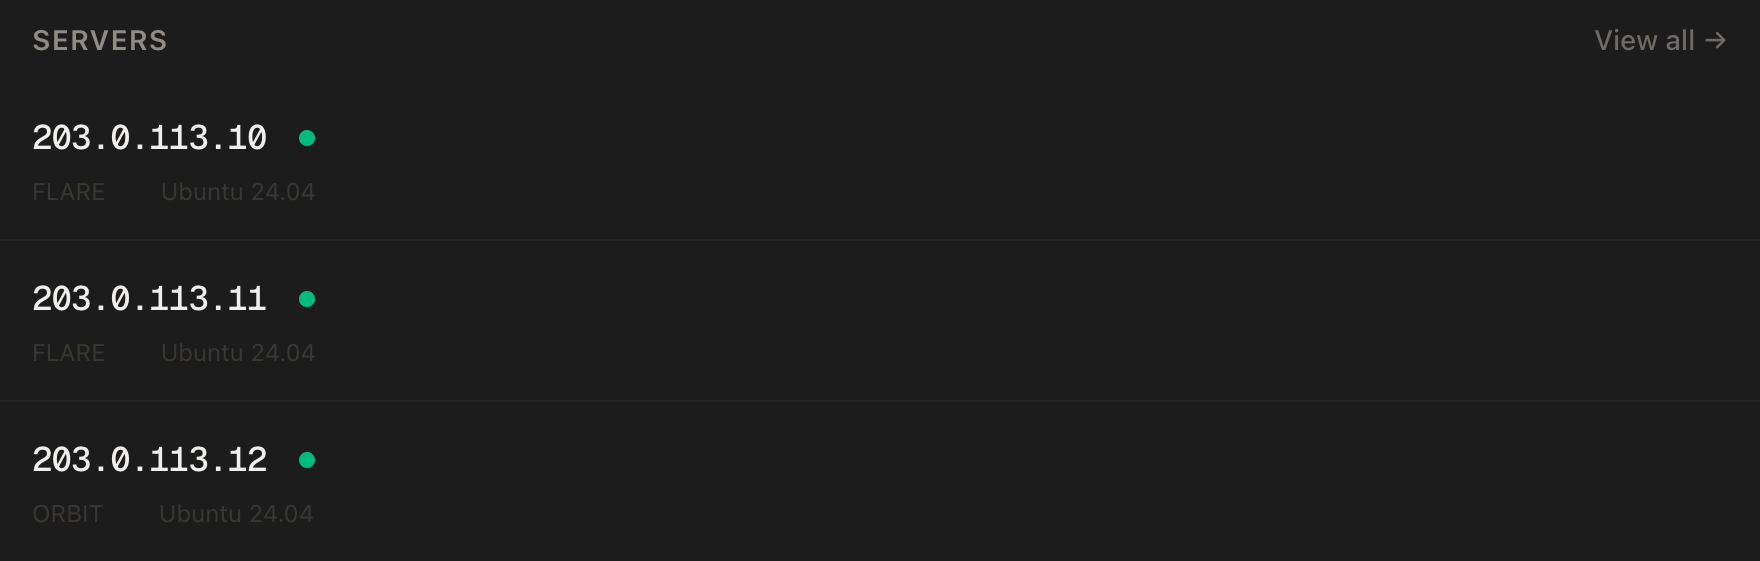
In the PrivateByte dashboard, open the store, choose Comet, pick Ubuntu 24.04, and deploy. Ready in a few minutes.
Step 2: Point your domain at the server
| Type | Name | Value |
|---|---|---|
| A | cloud |
your server's IP |
dig +short cloud.yourdomain.comThat must print your server's IP before you continue — AIO will check this itself, and fail politely until it's true.
Step 3: Connect over SSH
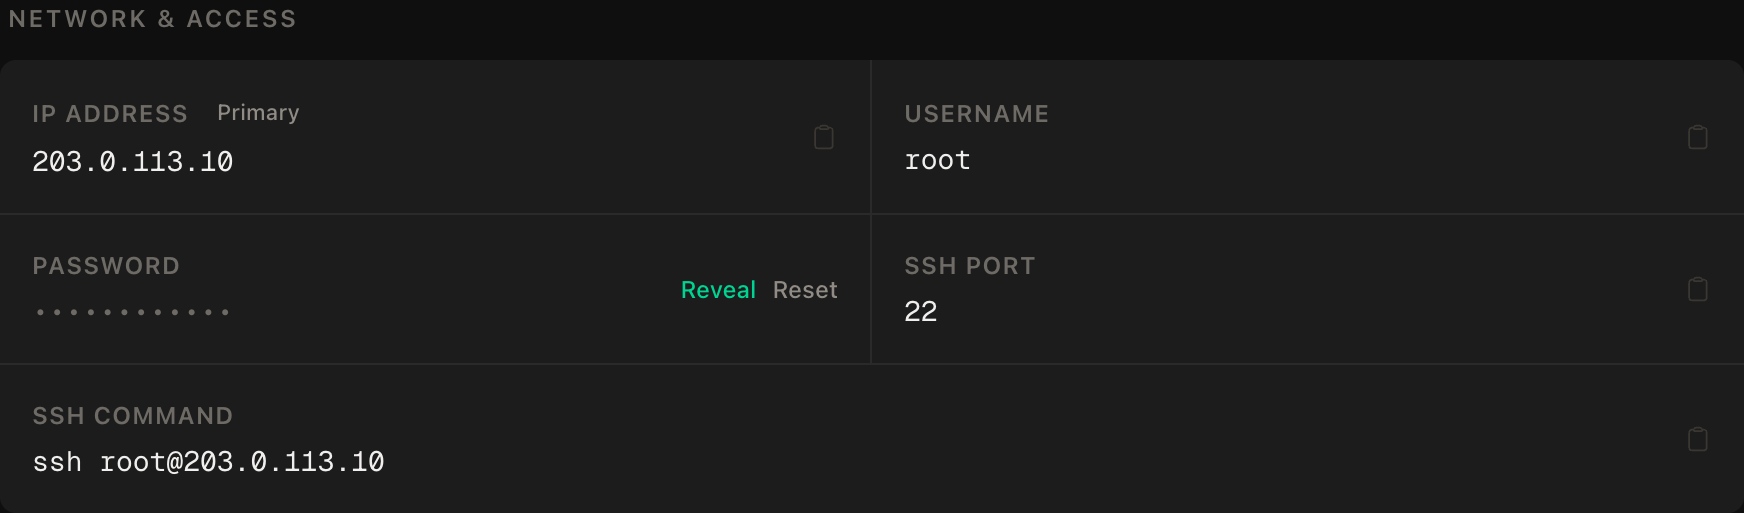
ssh root@YOUR_SERVER_IPWindows users: PowerShell has ssh built in, or use PuTTY. The dashboard also has a browser console if you'd rather install nothing.
ssh command.Step 4: Install Docker and set the firewall
apt update && apt upgrade -y
curl -fsSL https://get.docker.com | sh
systemctl enable --now docker
Firewall — SSH first, then the ports AIO genuinely needs, then enable:
ufw allow OpenSSH
ufw allow 80/tcp
ufw allow 443/tcp
ufw allow 8080/tcp
ufw allow 8443/tcp
ufw --force enable
ufw status
Four web ports is more than our usual guides open, and each has a job: 80 for certificate challenges and redirects, 443 for Nextcloud itself, 8443 for AIO's domain-validated admin interface, and 8080 for the first-run setup — that last one is temporary, and closing it again is a numbered step below, not a suggestion.
Step 5: Start the AIO mastercontainer
One command, verbatim from the project:
docker run \
  --init \
  --sig-proxy=false \
  --name nextcloud-aio-mastercontainer \
  --restart always \
  --publish 80:80 \
  --publish 8080:8080 \
  --publish 8443:8443 \
  --volume nextcloud_aio_mastercontainer:/mnt/docker-aio-config \
  --volume /var/run/docker.sock:/var/run/docker.sock:ro \
  ghcr.io/nextcloud-releases/all-in-one:latest
That docker.sock line is the trade from the top of this guide, in the flesh. Note also what it doesn't publish: 443. AIO's own Apache container will take that later — the mastercontainer is just the conductor.
Step 6: The AIO setup — and the passphrase that matters
Open https://YOUR_SERVER_IP:8080 — by IP, and expect a certificate warning. Both are deliberate: the setup interface uses a self-signed certificate and the project points you at the IP on purpose at this stage, so accept the warning this once.
The first screen shows your AIO passphrase. Stop and save it in your password manager now. It is shown once, it is the only key to this admin interface, and "I'll remember it" is how people end up reinstalling. This is the same hard-stop moment as the encryption key in our n8n guide.
Log in with it, enter cloud.yourdomain.com, and AIO validates the domain — this is where a wrong DNS record from Step 2 surfaces. Then choose optional components: on Comet, take what you'll use; on Orbit, leave Office, Talk and ClamAV off. Click start, and AIO downloads and launches the whole stack — several minutes on first run. When the containers show green, it hands you the initial admin username and password for Nextcloud itself — save those too, they're a different credential than the passphrase.
Step 7: Close the setup port
The 8080 interface has done its job; the same AIO admin is available on https://cloud.yourdomain.com:8443 from now on, with a real certificate. Close the temporary door:
ufw delete allow 8080/tcp
ufw status
This is the step that turns "installed" into "installed properly," and it's the one the verify section checks from outside.
Step 8: Connect your devices and turn on backups
Open https://cloud.yourdomain.com, log in with the initial admin credentials, and do the two things that make this a cloud rather than a website: install the desktop client (it syncs a folder like the product it's replacing) and the mobile app (turn on auto-upload for photos if that's part of your plan).
Then, before the honeymoon ends, backups: AIO ships BorgBackup integrated into the admin interface — open https://cloud.yourdomain.com:8443, set a backup location and schedule, and write down the Borg encryption password it gives you (credential number three, same password manager). Run the first backup manually and watch it succeed. PrivateByte's daily server backups sit underneath as the catch-all; the Borg archive is the one that restores Nextcloud cleanly rather than a whole machine.
Verify it works
The sync round trip. Drop a file in the desktop client's folder, watch it appear in the web UI and on your phone. That's the product working end to end.
The calendar/contacts round trip. Create an event on the phone app, see it in the web calendar. CardDAV/CalDAV is half the reason to run this; prove it now.
The setup port is closed — from outside. From your local machine:
curl -m 5 -k https://YOUR_SERVER_IP:8080This must fail. A timeout is Step 7 holding. If it answers, the admin interface's weakest door is still open to the internet — go back and close it.
The backup restores in principle. In the AIO backup panel, check the archive lists your first backup with a timestamp. A backup you've never seen listed is a hope; we've been through this in every guide.
It survives a reboot. reboot, wait two or three minutes — AIO brings up a whole fleet, give it time — then reload the site and check the desktop client reconnects on its own.
Troubleshooting
The domain check fails in Step 6. dig +short cloud.yourdomain.com must return the server IP, and 80/443 must be open. If you're behind anything that proxies traffic (an orange-cloud CDN entry, for instance), grey it out for this hostname — AIO needs to see the real ports during validation.
https://IP:8080 shows nothing. docker ps — is the mastercontainer running? docker logs nextcloud-aio-mastercontainer says why not. And confirm you typed https, not http.
You lost the AIO passphrase. There's no recovery — that's what a passphrase is. The project documents resetting the AIO configuration, which means re-running setup; your Nextcloud data survives in its volumes, but treat this as the painful lesson it is and save the next one.
Everything is slow, or containers restart under load. free -m and docker stats. This is the sizing paragraph arriving in person: turn off optional components in the AIO interface, or move to Comet. The office suite and antivirus are the usual heavyweights.
Phone apps can't connect but the website works. Use the full https://cloud.yourdomain.com URL in the app, not the IP — the certificate is for the name. If only new devices fail, check you haven't hit a brute-force throttle from earlier password attempts; unblock in the security settings.
The disk crept full. df -h, then look at Nextcloud's trash and versions retention — deleted files and old versions are kept by default and quietly add up. That, or your photo auto-upload succeeded harder than planned, which is the NAS conversation from the top.
Do it with an AI agent
If you'd rather hand this to Claude Code, Cursor, or another coding agent, don't paste the article at it. Articles are written for humans, and agents skim the warnings and lose the ordering. Copy this instead, and run it from your own machine with your agent able to SSH out.
Prompt for an AI agent
Set up Nextcloud All-in-One on a fresh Ubuntu 24.04 VPS using the official AIO
mastercontainer, which manages its own containers and certificates. There is NO
reverse proxy in this setup — AIO owns ports 80 and 443 by design.

FILL IN BEFORE YOU START:
- SERVER_IP = <VPS IP from the PrivateByte dashboard>
- DOMAIN    = <the subdomain, e.g. cloud.example.com>

WHAT TO DO:
1. FIRST, run "dig +short DOMAIN" and confirm it returns SERVER_IP. If not,
   STOP — AIO's own domain validation will fail and everything stalls there.
2. SSH to root@SERVER_IP. Confirm Ubuntu 24.04, run "free -m", and tell me the
   RAM. If under 8 GB, tell me to leave Office, Talk and ClamAV unticked later.
3. apt update && apt upgrade -y. Install Docker from https://get.docker.com.
4. Firewall, in THIS EXACT ORDER:
       a) ufw allow OpenSSH
       b) ufw allow 80/tcp
       c) ufw allow 443/tcp
       d) ufw allow 8080/tcp   <- temporary, removed in step 7
       e) ufw allow 8443/tcp
       f) ufw --force enable
5. Start the official mastercontainer EXACTLY as the project documents: docker
   run --init --sig-proxy=false --name nextcloud-aio-mastercontainer
   --restart always, publishing 80:80, 8080:8080 and 8443:8443 (NOT 443),
   volume nextcloud_aio_mastercontainer:/mnt/docker-aio-config, and
   /var/run/docker.sock mounted READ-ONLY. Image
   ghcr.io/nextcloud-releases/all-in-one:latest.
6. Tell me to open https://SERVER_IP:8080 (the certificate warning is expected
   there and only there), and to SAVE THE AIO PASSPHRASE in my password manager
   before doing anything else. WAIT for me to confirm it is saved. Then I enter
   DOMAIN, choose optional components, start the stack, and save the initial
   Nextcloud admin credentials — a second, different credential. WAIT again.
7. Once I confirm Nextcloud is up on https://DOMAIN: run
   "ufw delete allow 8080/tcp" and show me "ufw status" after.
8. Tell me where to configure the built-in Borg backup (the 8443 interface),
   remind me the Borg password is credential number three, and WAIT for me to
   confirm the first backup ran.

RULES:
- Do NOT install Caddy, nginx or any reverse proxy, and do not publish 443
  yourself — AIO's own stack takes it. If something is already bound to 80 or
  443, STOP and tell me instead of working around it.
- Never ask me for, print, or log the passphrase, admin password or Borg
  password. Your only involvement with credentials is telling me when to save
  them and waiting for confirmation.
- Do not tick or untick optional components yourself — report the RAM and let
  me choose.
- Nothing destructive. If a container named nextcloud-aio-mastercontainer
  already exists, STOP and ask.

VERIFY, AND SHOW ME THE OUTPUT OF EACH:
- "docker ps" -> the mastercontainer plus the AIO-managed stack, all up
- "curl -sI https://DOMAIN" -> HTTP 200 and a valid certificate
- THE NEGATIVE CONTROL, from MY machine, after step 7:
      curl -m 5 -k https://SERVER_IP:8080
  -> MUST fail or time out. If it answers, the setup interface is still open
  to the internet — re-do step 7 and show me ufw status.
- I confirm: a file synced from the desktop client appears on the web and on
  my phone, and a calendar event round-trips.
- I confirm: the backup panel lists a completed backup with a timestamp.
- reboot, wait 3 minutes (AIO restarts a whole fleet), then "docker ps" and
  "curl -sI https://DOMAIN" -> everything back without help.

Do not tell me a step succeeded without showing the command output that proves
it. If a verification fails, stop and report the actual error. Do not retry
silently and do not improvise a workaround — especially not by adding a proxy
or reopening 8080 "to check something".
Two things in that prompt are worth stealing for your own agent work. It tells the agent what not to build — a reverse proxy is the reflex move from every other tutorial in its training data, and here the reflex is the failure. And credentials appear only as confirmation gates: three different secrets get created during this install, the agent handles none of them, and the install isn't "done" until each is confirmed saved by the human who'll need them.
If photos are the main thing you're syncing, Immich does that one job better than a suite does — and your passwords deserve their own dedicated box entirely, which is Vaultwarden.
Deploy your VPS
A working private cloud — files everywhere, calendar and contacts off the big platforms, backups built in — is the centrepiece self-host, and AIO has made it a one-evening job.
The Comet plan is the honest size for the full suite, with the disk to make the sync worth having.
- Unmetered bandwidth, no overage
- Free DDoS protection
- Daily automated backups
- Browser console access
Common questions
Is this actually a Google Drive replacement? For files, sync, sharing links, calendar and contacts — yes, convincingly. What you take on is being your own ops team, which AIO shrinks to "keep it updated and check the backups". The search and the ecosystem integrations are where Google keeps an edge; whether that's worth your data is the whole question.
Why AIO instead of the plain Nextcloud Docker image? Because the plain image is just the app — database, cache, TLS, cron and office are all your problem, and the forums are full of the resulting installs. AIO is the project's own answer to that, with updates and backups included. The trade is the Docker socket, which this guide asks you to accept with open eyes on a dedicated box.
Can my family use it? Yes — accounts are free because it's your server. Each person gets their own files, calendar and quota; shared folders and family calendars are exactly the use case. The per-user cost of adding your household is zero, which is the line item this whole product category is built on.
What are the three passwords I keep hearing about? The AIO passphrase (admin of the installer), the Nextcloud admin password (admin of the cloud), and the Borg backup password (the key to your backups). Different jobs, no overlap, all three in the password manager — losing each hurts in a different way.
Nextcloud or Immich for photos? Both sync phone photos. Immich is a dedicated photo product — better timeline, faces, search; Nextcloud is a suite where photos are one app among many. Small overlap, different centres of gravity; some people run both on separate boxes and let each do its job.