Self-hosting a password manager sounds like the one thing you shouldn't self-host, right up until you look at what it actually involves. Vaultwarden is a lightweight Rust implementation of the Bitwarden server that works with every official Bitwarden client — desktop, mobile, browser extension — and runs comfortably on the cheapest VPS you can buy. About 25 minutes, and your vault stops being someone else's problem.
Using an AI coding agent? There's a ready-made prompt at the end of this guide. Copy that instead of this article.
What you'll need
- A PrivateByte VPS. The Flare plan ($5.99/mo: 1 vCPU, 2 GB RAM, 25 GB SSD) is genuinely plenty here — see the sizing note below.
- A domain name you control the DNS for. This one is not optional, and the reason is explained in Step 2.
- The Bitwarden client for whatever you use — browser extension, phone, desktop.
- About 25 minutes. Every command is copy-paste.
Sizing, honestly. Some of our tutorials tell you to skip the cheapest plan. This is not one of them. Vaultwarden is a single Rust binary with a SQLite database, and it idles at roughly 50 MB of RAM — for scale, that is about a fortieth of what Flare gives you. Unless you are hosting a vault for a large organisation with heavy attachment use, the cheapest plan is not a compromise, it is oversized. Be suspicious of any guide that recommends a bigger server for this.
Step 1: Deploy your VPS
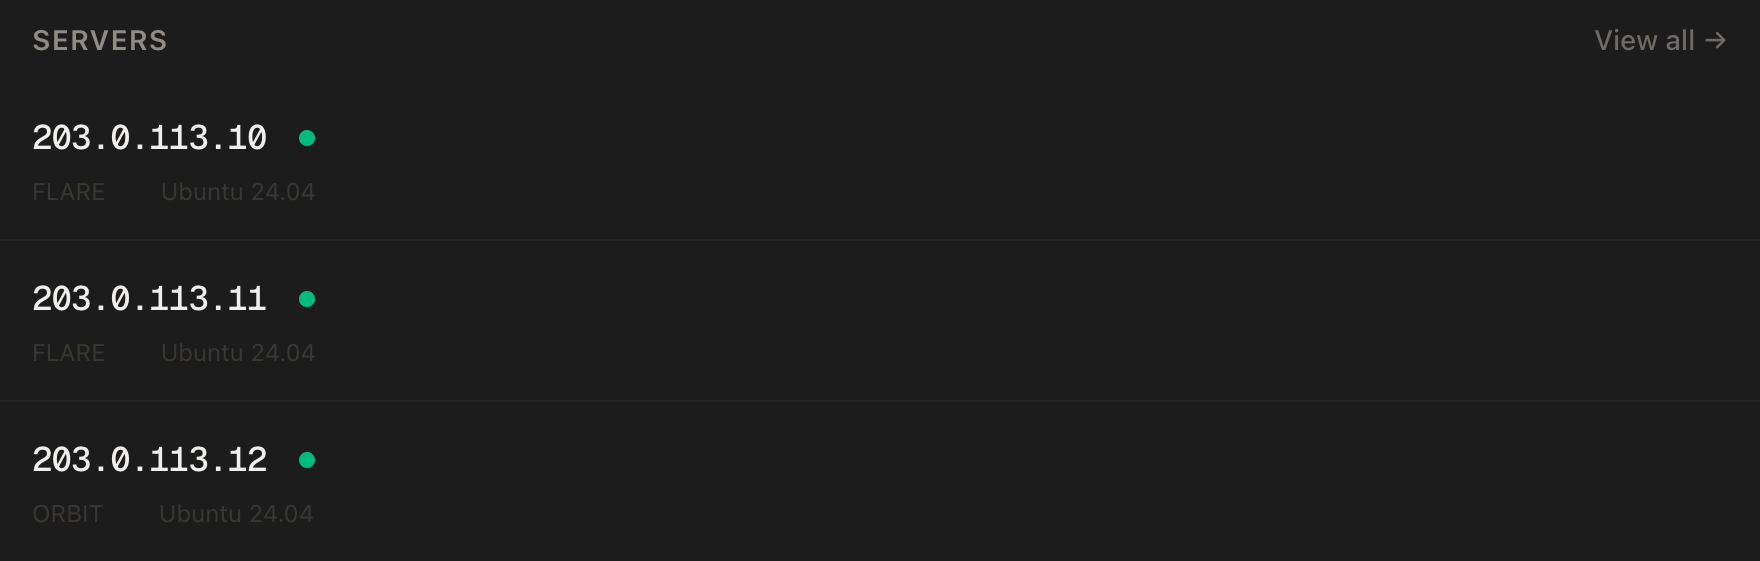
In the PrivateByte dashboard, open the store, choose Flare, pick Ubuntu 24.04, and deploy. Ready in a few minutes.
Pick the region closest to you. You'll be unlocking this vault several times a day, and latency on that round trip is the one thing you'll actually feel.
Step 2: Point your domain at the server
Do this first, before installing anything. DNS takes a few minutes to propagate, and the HTTPS step later fails if it hasn't.
In your registrar's DNS settings, create an A record:
| Type | Name | Value |
|---|---|---|
| A | vault |
your server's IP |
That gives you vault.yourdomain.com. Any subdomain works, just be consistent from here on.
Confirm it's live before going further:
dig +short vault.yourdomain.comWhy the domain is genuinely required here. Bitwarden clients do their encryption in the browser using the Web Crypto API, and browsers only expose that API in a secure context — HTTPS, or localhost. Serve Vaultwarden over plain HTTP on an IP address and the web vault loads, looks completely normal, and then fails to unlock. It is not a warning you can click through. Certificates are issued to hostnames, not IPs, so the domain is what makes the whole thing work at all.
Step 3: Connect over SSH
ssh root@YOUR_SERVER_IPWindows users: PowerShell has ssh built in, or use PuTTY. The dashboard also has a browser console if you'd rather install nothing.
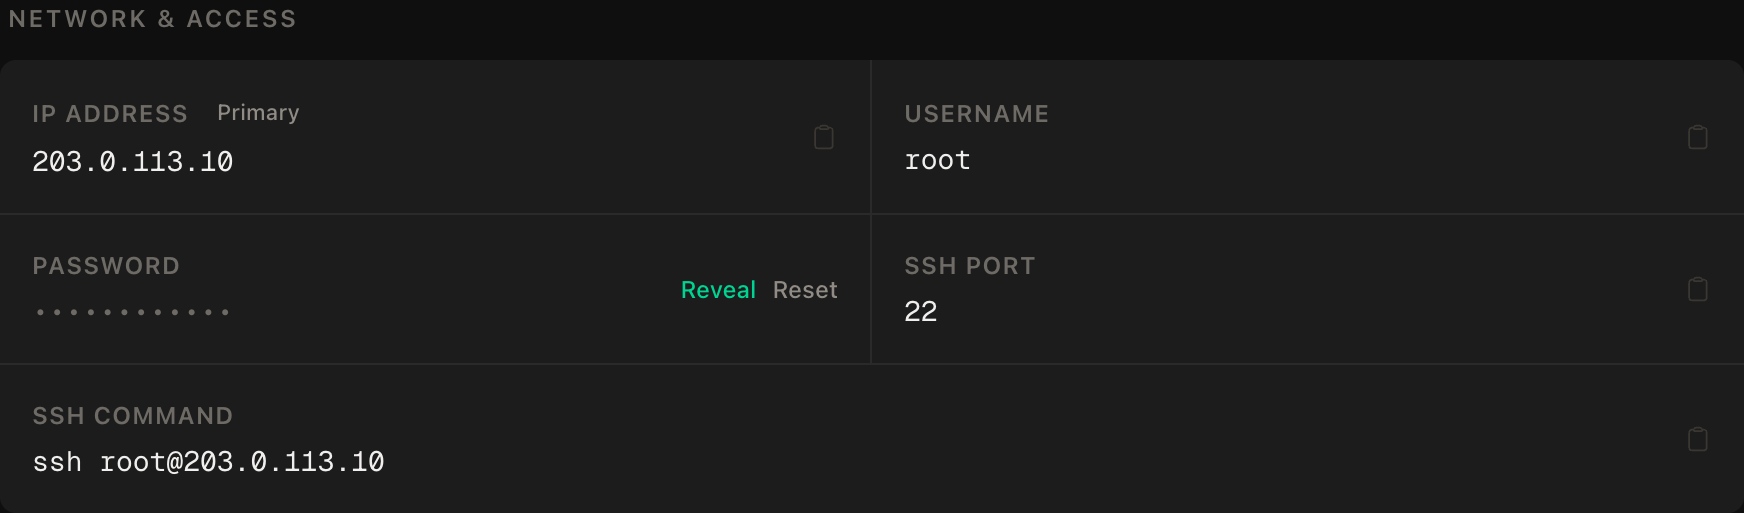
ssh command.Step 4: Install Docker
apt update && apt upgrade -y
curl -fsSL https://get.docker.com | sh
systemctl enable --now docker
docker --version
Step 5: Set up the firewall
Allow SSH first, then the web ports, then enable. Getting this order wrong ends your session and locks you out of your own server:
ufw allow OpenSSH
ufw allow 80/tcp
ufw allow 443/tcp
ufw --force enable
ufw status
Note what is not here. Vaultwarden's own port is never opened — it is reachable only through the HTTPS proxy in Step 7.
And note what is also not here: port 3012. A great many Vaultwarden guides still tell you to open it for WebSocket notifications. That port was deprecated in v1.29 and removed entirely in v1.31 — WebSocket traffic now rides the main HTTP port. The WEBSOCKET_ENABLED and WEBSOCKET_PORT variables you'll see in older guides are silently ignored. Opening 3012 today does nothing except widen your attack surface.
Step 6: Generate the admin token
Vaultwarden has an admin page at /admin for managing users and settings. It is protected by a single token, so that token is effectively a master key to your whole instance.
Modern Vaultwarden accepts a plain string here, but you should use an Argon2 hash instead, so the raw secret is never stored on the server at all:
docker run --rm -it vaultwarden/server /vaultwarden hashIt prompts you for a password, asks you to confirm it, and prints a PHC string starting with $argon2id$. Save the password you typed in your password manager now — that is what you'll enter at /admin. The printed hash is what goes on the server.
Copy the entire hash, including the leading $argon2id$.
Here is the trap. That hash is full of $ characters, and Docker Compose treats $ as the start of a variable. Paste it directly into docker-compose.yml and Compose eats half of it, leaving you with an admin page that rejects the correct password and no indication why. If you ever do inline it, every $ must be doubled to $$. We're going to sidestep the whole problem by putting it in .env, where a single $ is safe — which is also what Vaultwarden's own documentation recommends.
Step 7: Write the configuration
mkdir -p ~/vaultwarden && cd ~/vaultwarden
nano .env
# --- your domain -----------------------------------------------------
DOMAIN=https://vault.yourdomain.com
# --- admin page ------------------------------------------------------
# The full $argon2id$... string from Step 6. Single $ is correct here.
ADMIN_TOKEN=PASTE_THE_ARGON2_HASH_HERE
# --- registration ----------------------------------------------------
# true only long enough to create your own account. Step 9 turns it off.
SIGNUPS_ALLOWED=trueLock it down:
chmod 600 .envDOMAIN must be the full URL, including https://. Vaultwarden uses it to build the links in invitation emails, the attachment URLs, and the relying-party identity for WebAuthn. Get it wrong and hardware security keys register against the wrong origin, then refuse to authenticate later — with an error that points nowhere near this line.
Now the Compose file:
nano docker-compose.ymlservices:
vaultwarden:
image: vaultwarden/server:latest
restart: unless-stopped
environment:
DOMAIN: ${DOMAIN}
ADMIN_TOKEN: ${ADMIN_TOKEN}
SIGNUPS_ALLOWED: ${SIGNUPS_ALLOWED}
volumes:
- vw_data:/data
caddy:
image: caddy:2-alpine
restart: unless-stopped
ports:
- "80:80"
- "443:443"
volumes:
- ./Caddyfile:/etc/caddy/Caddyfile:ro
- caddy_data:/data
- caddy_config:/config
volumes:
vw_data:
caddy_data:
caddy_config:Vaultwarden has no ports: section. It exists only on the internal Docker network, and Caddy is the only thing the internet can reach.
Then the Caddy config, which is three lines because Caddy obtains and renews certificates on its own:
nano Caddyfilevault.yourdomain.com {
reverse_proxy vaultwarden:80
}Use your real hostname — Caddy reads this file literally and will not pick the value up from .env. You do not need to configure anything for WebSockets: Caddy passes the Upgrade and Connection headers through by default, which is the entire reason this file is three lines instead of fifteen.
Step 8: Start it
docker compose up -d
docker compose ps
Both containers should show as running. Caddy requests a certificate from Let's Encrypt on first start:
docker compose logs caddy | tail -20Look for a line confirming a certificate was obtained. Repeated failures almost always mean DNS from Step 2 hasn't propagated — wait, then docker compose restart caddy.
Step 9: Create your account, then close the door
Open https://vault.yourdomain.com. You should get the Bitwarden web vault with a valid padlock and no certificate warning.
Create your account. Your master password is the only thing standing between an attacker and your vault, and there is no reset — nobody, including you, can recover it.
Now immediately turn registration off, or anyone who finds your domain can create an account on your server:
sed -i 's/SIGNUPS_ALLOWED=true/SIGNUPS_ALLOWED=false/' .env
docker compose up -d
docker compose up -d recreates the container with the new value. A plain docker compose restart will not pick up a changed environment variable — it reuses the existing container, and you would be left believing signups were closed when they are wide open.
Verify it actually took, rather than assuming:
docker compose exec vaultwarden printenv SIGNUPS_ALLOWEDThat must print false. Then open your site in a private window and confirm the "Create account" option is gone.
Verify it works
Point a real client at it. In the Bitwarden browser extension or mobile app, tap the settings gear on the login screen before logging in, and set the server URL to https://vault.yourdomain.com. This is the step people miss — the client defaults to Bitwarden's own cloud, so entering your credentials without changing it just fails against the wrong server.
Log in, create a test entry, and confirm it appears in a second client. That round trip proves the database, the certificate and the WebSocket notifications are all working together.
Check the admin page opens: go to https://vault.yourdomain.com/admin and enter the password you chose in Step 6. The diagnostics page there has a WebSocket check that should be green.
Then confirm it survives a reboot:
rebootWait a minute, reconnect, and reload the site. restart: unless-stopped should bring everything back without you touching it.
Back it up properly
This is your password vault. A backup you never tested is not a backup.
Everything lives in the vw_data volume. Four things in it matter:
| File | What it holds |
|---|---|
db.sqlite3 |
Every vault entry, user and organisation |
attachments/ |
Files attached to vault items |
rsa_key.* |
Signs the authentication tokens |
config.json |
Settings made through the admin page |
Do not just cp the database while Vaultwarden is running. SQLite may be mid-write, and you get a file that restores into a corrupt vault. Vaultwarden ships its own backup command that uses SQLite's online backup API safely:
docker compose exec vaultwarden /vaultwarden backupThat writes a consistent snapshot alongside the live database. Then archive the whole data volume — still on the server, from ~/vaultwarden:
docker run --rm -v vaultwarden_vw_data:/data -v ~/vaultwarden:/backup alpine \
  tar czf /backup/vaultwarden-backup.tar.gz -C /data .
And pull it down, this time from your local machine:
scp root@YOUR_SERVER_IP:~/vaultwarden/vaultwarden-backup.tar.gz .A backup that never leaves the server it protects is not a backup.
One honest clarification, because it gets overstated: losing rsa_key.* does not destroy your vault. It logs every user out and invalidates any open invitations, and everyone signs in again. Your entries are encrypted with keys derived from your master password, not with that file. It is worth backing up because re-logging-in every device is annoying, not because it is catastrophic.
PrivateByte takes daily automated backups of the whole server, which covers you for a dead disk. Keep a copy somewhere else too — that is what covers you for a mistake you make yourself.
Troubleshooting
The web vault loads but won't unlock, or says the browser isn't supported. You're on HTTP rather than HTTPS. The Web Crypto API browsers need for the decryption is only available in a secure context. Fix the certificate; there is no client-side workaround.
The admin page rejects the correct password. The $ characters in the Argon2 hash were eaten by Docker Compose's variable interpolation. Keep the hash in .env with single $, or double every one of them to $$ if it is inlined in the YAML. Recreate the container with docker compose up -d afterwards, not restart.
Certificate errors, or the site won't load over HTTPS. Caddy couldn't complete the Let's Encrypt challenge. Confirm dig +short vault.yourdomain.com returns your IP, that ufw status shows 80 and 443 open, and read docker compose logs caddy. Port 80 must be open even though you browse on 443 — the challenge uses it.
Changes to .env seem to have no effect. You used docker compose restart, which reuses the existing container and its old environment. Use docker compose up -d, then confirm with docker compose exec vaultwarden printenv <VAR>.
Hardware security keys register but then won't authenticate. DOMAIN doesn't match the URL you're actually visiting, so WebAuthn is checking against a different origin. It must be the full URL with https:// and the exact hostname, no trailing slash.
Push notifications don't arrive on mobile. Vaultwarden doesn't route through Bitwarden's push service by default. The vault still syncs when you open the app — this is a limitation of self-hosting, not a broken install.
Do it with an AI agent
If you'd rather hand this to Claude Code, Cursor, or another coding agent, don't paste the article at it. Articles are written for humans, and agents skim the warnings and lose the ordering. Copy this instead, and run it from your own machine with your agent able to SSH out.
Prompt for an AI agent
Set up Vaultwarden (a Bitwarden-compatible password manager) on a fresh Ubuntu
24.04 VPS, behind HTTPS, using Docker and Caddy.

FILL IN BEFORE YOU START:
- SERVER_IP = <VPS IP from the PrivateByte dashboard>
- DOMAIN    = <the subdomain, e.g. vault.example.com>

WHAT TO DO:
1. FIRST, before anything else, run "dig +short DOMAIN" and confirm it returns
   SERVER_IP. If it does not, STOP and tell me. Everything downstream depends on
   this, and finding out at the certificate step wastes the whole run.
2. SSH to root@SERVER_IP. Confirm it is Ubuntu 24.04 before changing anything.
3. apt update && apt upgrade -y. Install Docker from https://get.docker.com and
   enable the service.
4. Firewall, in THIS EXACT ORDER:
       a) ufw allow OpenSSH
       b) ufw allow 80/tcp
       c) ufw allow 443/tcp
       d) ufw --force enable
   Do NOT open port 3012. It was removed in Vaultwarden v1.31 and WebSockets now
   use the main HTTP port. Do NOT publish Vaultwarden's own port either.
5. Generate the admin token by running:
       docker run --rm -it vaultwarden/server /vaultwarden hash
   ASK ME to type the password at the prompt. Capture the resulting
   $argon2id$... string.
6. Create ~/vaultwarden/.env containing DOMAIN=https://DOMAIN, the full
   ADMIN_TOKEN hash, and SIGNUPS_ALLOWED=true. chmod 600 it.
   The hash MUST go in .env, not inlined in the YAML. Docker Compose interpolates
   $ characters and will silently corrupt it. If you inline it anyway, every
   single $ must be doubled to $$.
7. Create ~/vaultwarden/docker-compose.yml with two services: vaultwarden
   (vaultwarden/server:latest, named volume at /data, environment from .env, and
   NO ports section) and caddy (caddy:2-alpine, ports 80 and 443, Caddyfile
   mounted read-only, named volumes for /data and /config).
8. Create ~/vaultwarden/Caddyfile containing:
       DOMAIN { reverse_proxy vaultwarden:80 }
9. docker compose up -d
10. Tell me to open https://DOMAIN and create my account, and WAIT for me to
    confirm I have done it. Do not continue until I confirm.
11. Only then, set SIGNUPS_ALLOWED=false in .env and run "docker compose up -d"
    to recreate the container. Do NOT use "docker compose restart" — it reuses
    the old environment and the change will not apply.

RULES:
- Never print, echo or log the admin password or the token hash. To check a
  variable is set, check it is non-empty, never what it contains.
- The ufw ordering in step 4 is not optional. Enabling the firewall before
  allowing OpenSSH locks me out of my own server.
- Do not skip step 10's wait. Turning signups off before I have an account
  locks me out of my own vault and the only fix is editing config on the server.
- Nothing destructive. If ~/vaultwarden already exists or containers are already
  running, STOP and ask. Never overwrite an existing vault's data volume.
- Do not create vault entries, users or organisations. That is mine to do.

VERIFY, AND SHOW ME THE OUTPUT OF EACH:
- "docker compose ps" -> both containers running
- "docker compose logs caddy | tail -20" -> a certificate was obtained, no
  repeated failures
- "curl -sI https://DOMAIN" -> HTTP 200 and a successful TLS handshake
- "docker compose exec vaultwarden printenv SIGNUPS_ALLOWED" -> false, AFTER
  step 11. This is the check that proves registration is actually closed rather
  than assumed closed.
- reboot, wait 60 seconds, then "docker compose ps" and "curl -sI https://DOMAIN"
  again -> everything back up on its own

Do not tell me a step succeeded without showing the command output that proves
it. If a verification fails, stop and report the actual error. Do not retry
silently and do not improvise a workaround, especially around the firewall.
Two things in that prompt are worth stealing for your own agent work. It makes the agent stop and wait at step 10, because closing registration before an account exists locks you out of the thing you just built — an unrecoverable ordering deserves a hard stop, not a warning. And the final check reads the variable back out of the running container rather than trusting that the edit applied, which is the difference between knowing your vault is closed and hoping it is.
The Docker, Caddy and automatic-HTTPS pattern here is the same one used for self-hosting n8n. If you want to put your own application behind that certificate instead, see deploying a Node app with a domain and HTTPS.
Deploy your VPS
A self-hosted vault is one of the best arguments for a VPS there is: tiny resource footprint, enormous value, and the data in question is precisely the data you'd least like to hand to a third party.
The Flare plan is the honest recommendation here, not an upsell. Vaultwarden idles at around 50 MB, so 2 GB of RAM is not a constraint you will ever meet.
- Unmetered bandwidth, no overage
- Free DDoS protection
- Daily automated backups
- Browser console access
Common questions
Is Vaultwarden the same as Bitwarden? Not the same software, but the same protocol. Vaultwarden is an independent Rust implementation of the Bitwarden server API, so every official Bitwarden client works with it unmodified. It also enables premium features that are paid on Bitwarden's hosted plans, which is the main reason people run it.
Is self-hosting my passwords actually safe? Your vault is encrypted on your device before it ever reaches the server, so the server only ever holds ciphertext — that part is identical whether you self-host or not. What changes is that patching, backups and access control become yours. If you keep the server updated and your backups tested, it is a reasonable trade. If you would not do those things, hosted Bitwarden is the better answer, and there is no shame in it.
What happens if my server goes down? Every Bitwarden client keeps an encrypted local cache, so you can still read and use your existing entries offline. What you lose until the server returns is syncing between devices.
How do I update Vaultwarden?
docker compose pull && docker compose up -d from ~/vaultwarden. Take a backup first, and read the release notes for anything marked as a breaking change.
Can I use this for my family or team?
Yes. Leave SIGNUPS_ALLOWED=false and invite people from the admin page instead, so registration stays closed to the internet. Organisations and collections work as they do in Bitwarden, including shared folders.