Self-hosting Home Assistant on a VPS suits some jobs and not others, and most guides don't say which. This one does. You'll run Home Assistant in Docker with automatic HTTPS and two-factor login, add an MQTT broker, and tunnel back to your home network with WireGuard, in about 40 minutes.
Using an AI coding agent? There's a ready-made prompt at the end of this guide. Copy that instead of this article.
What a VPS can and cannot do
A VPS is not in your house. Home Assistant finds most local devices with multicast on the LAN (mDNS/zeroconf, UPnP/SSDP). A server in a data centre never hears it. Zigbee and Z-Wave USB dongles plug into a machine, and that machine has to be at home.
| Works well on a VPS | Does not work on a VPS |
|---|---|
| Cloud-API integrations (weather, calendars, notifications, web services) | Automatic discovery of home devices |
| An MQTT broker your devices publish to | USB Zigbee / Z-Wave / Bluetooth dongles |
| Dashboards reachable from anywhere, no open home router port | Anything that needs to sit on your home LAN |
| Automations that call APIs and send alerts | Add-ons (Container installs have none) |
| Devices you add by IP through a WireGuard tunnel |
If your smart home is mostly Zigbee bulbs and a hub, keep Home Assistant at home. If you want a hosted brain for cloud services, a broker and remote dashboards, or a second always-reachable instance, this fits. The tunnel in Step 7 covers the middle ground: devices with an IP on your home network can be reached from the VPS, added by address rather than discovered.
What you'll need
- A PrivateByte VPS. We recommend Orbit ($7.99/mo: 2 vCPU, 4 GB RAM, 50 GB SSD). Flare ($5.99/mo: 1 vCPU, 2 GB RAM, 25 GB SSD) works for a small setup, but history and integrations grow.
- A domain name you control the DNS for.
- A phone authenticator app.
- For Step 7: a device at home that can run WireGuard (a router, a Raspberry Pi, a spare PC).
We're installing Home Assistant Container, the official Docker image. It isn't Home Assistant OS or Supervised, so there are no add-ons. That's why the MQTT broker is its own container.
Step 1: Deploy your VPS
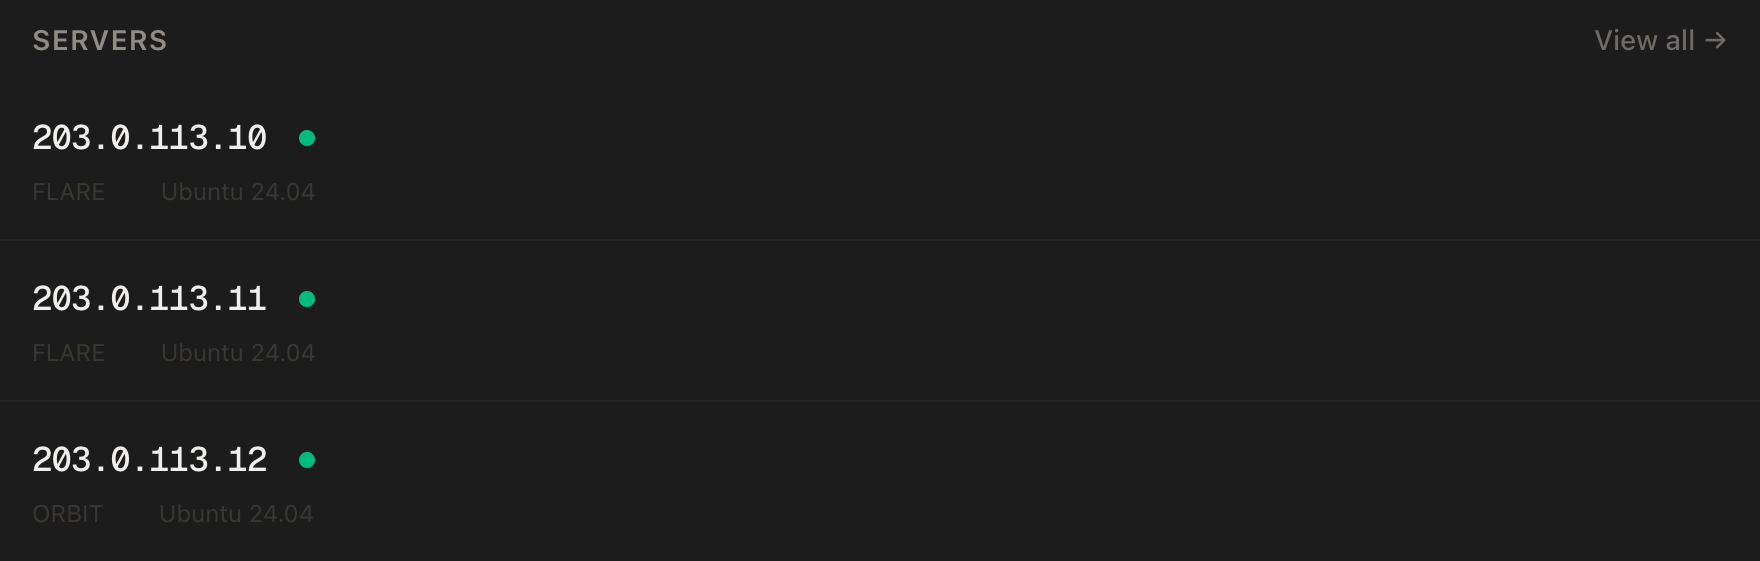
In the PrivateByte dashboard, open the store, choose Orbit, pick Ubuntu 24.04, and deploy. Ready in a few minutes.
Step 2: Point your domain at the server
| Type | Name | Value |
|---|---|---|
| A | home |
your server's IP |
dig +short home.yourdomain.comThat must print your server's IP before you continue.
Step 3: Connect, firewall, Docker
ssh root@YOUR_SERVER_IP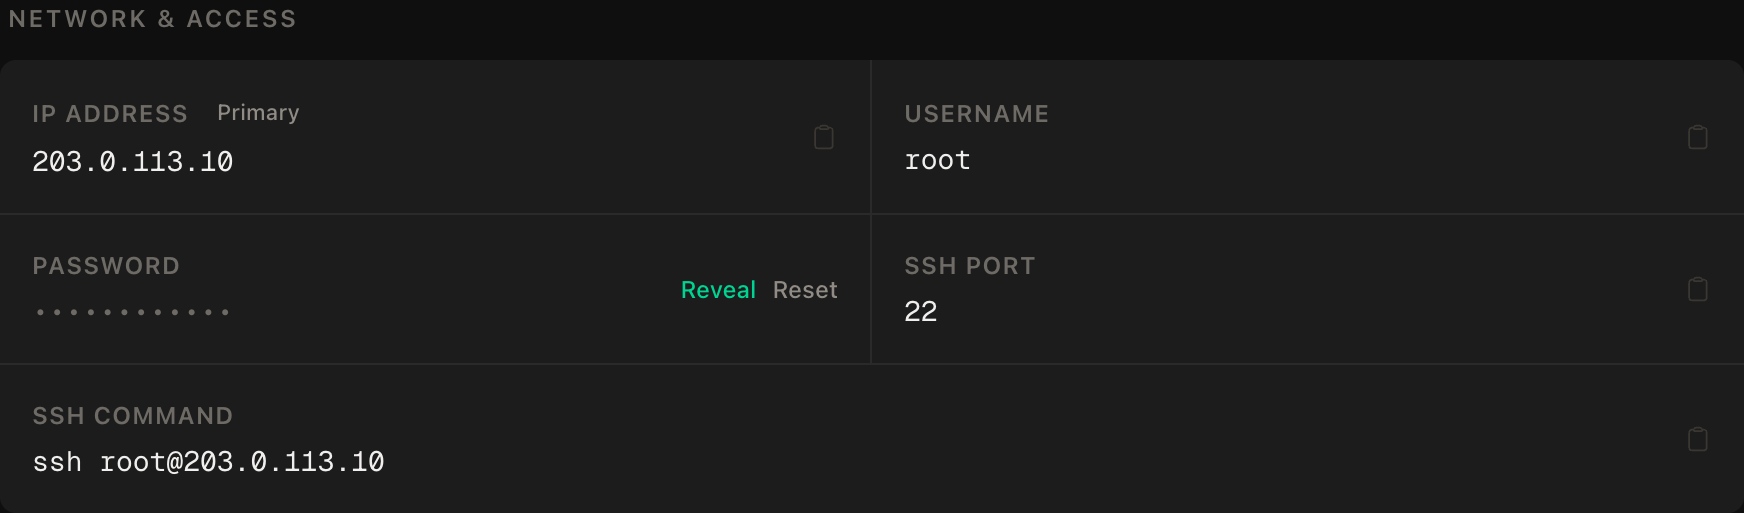
ssh command.SSH first, then the web ports, then enable:
apt update && apt upgrade -y
ufw allow OpenSSH
ufw allow 80/tcp
ufw allow 443/tcp
ufw allow 51820/udp
ufw --force enable
curl -fsSL https://get.docker.com | sh
systemctl enable --now docker
51820/udp is for the WireGuard tunnel in Step 7. Port 8123 stays closed. Ports Docker publishes can bypass ufw, so the compose file binds Home Assistant to 127.0.0.1 rather than trusting the firewall.
Step 4: The Home Assistant config
mkdir -p ~/homeassistant/{config,mosquitto} && cd ~/homeassistant
nano config/configuration.yaml
default_config:
http:
use_x_forwarded_for: true
trusted_proxies:
- 172.30.32.2This is the part everyone trips on. Home Assistant blocks requests that arrive through a reverse proxy unless it trusts that proxy. Without these lines you get a 400 Bad Request behind Caddy. 172.30.32.2 is Caddy's fixed address on the private network defined next. Trust that one address and nothing else. If you use a range, it must be the network address (172.30.32.0/24), not a host address with a mask.
Recent Home Assistant releases moved these settings into the UI, under Settings > System > Network > HTTP server (Trust X-Forwarded-For and Trusted proxies), and import an existing http: block. Step 6 shows how to confirm it took, and what to do if it didn't.
Set your time zone in a file compose reads:
echo 'TZ=Europe/London' > .envStep 5: The compose file
nano docker-compose.ymlservices:
homeassistant:
image: ghcr.io/home-assistant/home-assistant:stable
restart: unless-stopped
stop_grace_period: 60s
environment:
TZ: ${TZ}
volumes:
- ./config:/config
- /etc/localtime:/etc/localtime:ro
ports:
- "127.0.0.1:8123:8123"
networks:
- ha
mosquitto:
image: eclipse-mosquitto:2
restart: unless-stopped
volumes:
- ./mosquitto:/mosquitto/config
- mosquitto_data:/mosquitto/data
networks:
- ha
caddy:
image: caddy:2-alpine
restart: unless-stopped
ports:
- "80:80"
- "443:443"
volumes:
- ./Caddyfile:/etc/caddy/Caddyfile:ro
- caddy_data:/data
- caddy_config:/config
networks:
ha:
ipv4_address: 172.30.32.2
networks:
ha:
ipam:
config:
- subnet: 172.30.32.0/24
volumes:
mosquitto_data:
caddy_data:
caddy_config:Three deliberate choices. Home Assistant's docs show network_mode: host and privileged: true so it can see your LAN and Bluetooth; a VPS has neither, so we use a normal Docker network and drop the privileges. The fixed subnet lets trusted_proxies name Caddy exactly. The :stable tag follows official releases; Step 10 covers pinning.
The broker config, with no anonymous access:
nano mosquitto/mosquitto.conflistener 1883
allow_anonymous false
password_file /mosquitto/config/passwd
persistence true
persistence_location /mosquitto/data/Create the broker user (it prompts for a password; keep it in your password manager):
docker run --rm -it -v "$PWD/mosquitto:/mc" eclipse-mosquitto:2 mosquitto_passwd -c /mc/passwd haAnd the Caddyfile:
nano Caddyfilehome.yourdomain.com {
reverse_proxy homeassistant:8123
}Caddy gets the certificate itself and passes the WebSocket upgrade Home Assistant's frontend needs.
Step 6: Start it, create the account, turn on 2FA
docker compose up -d
docker compose logs caddy | tail -20
Open https://home.yourdomain.com. First start takes a minute or two. Onboarding creates the owner account: use a long password from your password manager, since this account controls everything.
Turn on two-factor now. Click your name at the bottom of the sidebar, open Security, and under Multi-factor authentication modules choose Enable. Scan the QR code and enter the six-digit code. Codes depend on the clock, so keep the server's time correct (Ubuntu does by default).
If the page loads and you can log in, the proxy setting stuck. To see it, Settings > System > Network > HTTP server should show Trust X-Forwarded-For on, with 172.30.32.2 under trusted proxies.
If you get a 400 Bad Request instead, the block wasn't picked up. Open a tunnel from your own machine and set it in the UI:
ssh -L 8123:127.0.0.1:8123 root@YOUR_SERVER_IPThen browse to http://localhost:8123, finish onboarding there, and set the two options under Settings > System > Network.
Step 7: WireGuard back to your home network
This turns the VPS from an island into part of your smart home. Set up the server side with our WireGuard VPN server guide: that gives you wg0 on the VPS at 10.8.0.1, listening on 51820. Here we add a site-to-site peer for your home.
On the home device, generate a keypair and note the public key. On the VPS, add a peer to /etc/wireguard/wg0.conf:
[Peer]
# home network
PublicKey = HOME_DEVICE_PUBLIC_KEY
AllowedIPs = 10.8.0.2/32, 192.168.1.0/24
Replace 192.168.1.0/24 with your real home subnet. It must not overlap 10.8.0.0/24 or 172.30.32.0/24. That AllowedIPs line tells the VPS the home LAN is that way. Apply it live, without dropping other peers:
wg syncconf wg0 <(wg-quick strip wg0)On the home device, the config is the mirror image:
[Interface]
Address = 10.8.0.2/32
PrivateKey = HOME_DEVICE_PRIVATE_KEY

[Peer]
PublicKey = VPS_PUBLIC_KEY
Endpoint = YOUR_SERVER_IP:51820
AllowedIPs = 10.8.0.1/32
PersistentKeepalive = 25
The keepalive matters: your home router is behind NAT, so the tunnel is initiated from home. The home device also needs IP forwarding on, and either NAT for tunnel traffic onto the LAN or a return route on your router, otherwise your devices get packets from 10.8.0.1 and can't answer. That part is router-specific.
Test from the VPS:
ping -c 3 192.168.1.50Use the address of any device at home. Replies mean Home Assistant can reach it too. Then add it in Home Assistant by IP address where the integration allows it. Check each integration's page: some accept a host, some only discovery.
To let home devices publish to your broker, expose it on the tunnel address only. Under mosquitto: in the compose file add:
    ports:
      - "10.8.0.1:1883:1883"
then docker compose up -d. If wg0 isn't up when Docker starts, the bind fails, so start WireGuard first (it's enabled at boot in the WireGuard guide).
Step 8: First integrations
Three that prove the setup without home hardware:
- Weather: Settings > Devices & services > Add integration > Meteorologisk institutt (Met.no). No account needed.
- MQTT: add the MQTT integration with broker
mosquitto, port1883, userhaand the Step 5 password. Test it:docker compose exec mosquitto mosquitto_pub -h localhost -u ha -P 'YOUR_BROKER_PASSWORD' -t test/hello -m on. Home Assistant requires MQTT version 5, which Mosquitto 2 speaks. - A notification or API automation: a Telegram bot or a REST sensor on a schedule.
Step 9: Backups that leave the box
The state that matters is the config folder: automations, dashboards, integrations, settings. History is disposable. Archive it without the database files:
cd ~/homeassistant
tar czf ha-config-$(date +%F).tar.gz --exclude='*.db' --exclude='*.db-*' --exclude='*.log*' config mosquitto
Then copy it off the server, from your own machine:
scp root@YOUR_SERVER_IP:~/homeassistant/ha-config-*.tar.gz ./ha-backups/For nightly, add a root cron line on the server, and schedule the scp or rsync on a machine you own:
0 3 * * * cd /root/homeassistant && tar czf /root/homeassistant/ha-config-$(date +\%F).tar.gz --exclude='*.db' --exclude='*.db-*' --exclude='*.log*' config mosquittoHome Assistant also makes its own encrypted backups (Settings > System > Backups). Turn on automatic ones and download the encryption key when offered, because a backup you can't decrypt is decoration. Treat them as a second copy. PrivateByte's daily server backups sit underneath, but the off-box archive is the one that saves you if you lose the account.
Step 10: Updates
cd ~/homeassistant
# take the backup above first
docker compose pull
docker compose up -d
Home Assistant ships monthly, and each release lists breaking changes. Read them before pulling, especially with custom integrations. To update deliberately, replace :stable with a version tag and bump it yourself.
Verify it works
- HTTPS and login.
https://home.yourdomain.comloads with a padlock and asks for your code as well as your password. - Negative control: not exposed directly. From your own machine:
curl -m 5 http://YOUR_SERVER_IP:8123This must fail or time out. If it answers, 8123 is published to the world; bind it to 127.0.0.1 as in Step 5.
- The broker rejects strangers.
mosquitto_pubwithout-u/-Pmust be refused. - The tunnel is up.
wg showlists a recent handshake, and the Step 7pinganswers. - A backup is readable.
tar tzf ha-config-*.tar.gz | headlistsconfig/configuration.yaml. - It survives a reboot.
reboot, wait a minute, load the site.
Troubleshooting
400 Bad Request behind Caddy. Home Assistant doesn't trust the proxy. Check trusted_proxies holds 172.30.32.2 exactly and use_x_forwarded_for is on, then look under Settings > System > Network > HTTP server. Use the Step 6 SSH tunnel if you're locked out of the UI.
Certificate errors. dig +short home.yourdomain.com must return your IP, 80 and 443 must be open, and docker compose logs caddy says what failed.
Tunnel up but home devices don't answer. Almost always home-side routing: forwarding off, no NAT or return route, or overlapping subnets. Ping the LAN device from the home device first, then from the VPS.
"My devices don't show up." They won't be discovered. That's the multicast limit, not a fault. Add them by IP through the tunnel, or run Home Assistant at home for those.
MQTT won't connect. Broker mosquitto (the service name, not localhost), port 1883, and the exact user and password from mosquitto_passwd. If the broker exits on start, check docker compose logs mosquitto for a password-file permissions complaint.
Locked out after enabling 2FA. Check the phone's clock first, and keep recovery notes for the owner account.
Do it with an AI agent
Don't paste the article at Claude Code, Cursor or another agent: agents skim warnings and lose ordering. Copy this instead, and run it from your own machine with your agent able to SSH out.
Prompt for an AI agent
Set up Home Assistant Container on a fresh Ubuntu 24.04 VPS with Docker, behind
Caddy for automatic HTTPS, with an internal Mosquitto MQTT broker and Home
Assistant's own port never exposed to the internet.

FILL IN BEFORE YOU START:
- SERVER_IP = <VPS IP from the PrivateByte dashboard>
- DOMAIN    = <e.g. home.example.com>
- TIMEZONE  = <IANA name, e.g. Europe/London>
- The Home Assistant owner password, the MQTT broker password and the 2FA
  enrolment are MINE.

WHAT TO DO:
1. FIRST, "dig +short DOMAIN" must return SERVER_IP. If not, STOP.
2. SSH to root@SERVER_IP. Confirm Ubuntu 24.04 and report "free -m".
3. apt update && apt upgrade -y. Firewall in THIS ORDER: ufw allow OpenSSH;
   ufw allow 80/tcp; ufw allow 443/tcp; ufw allow 51820/udp; ufw --force
   enable. Not 8123. Not 1883.
4. Install Docker from https://get.docker.com.
5. mkdir -p ~/homeassistant/{config,mosquitto}. Write config/configuration.yaml:
   "default_config:" then an http: block with use_x_forwarded_for: true and
   trusted_proxies: [172.30.32.2]. Write ~/homeassistant/.env with
   TZ=TIMEZONE.
6. Write docker-compose.yml: homeassistant
   (ghcr.io/home-assistant/home-assistant:stable, ./config:/config, TZ,
   ports ONLY "127.0.0.1:8123:8123", on network ha); mosquitto
   (eclipse-mosquitto:2, ./mosquitto:/mosquitto/config, a data volume, NO
   ports section); caddy (caddy:2-alpine, 80/443, Caddyfile read-only, fixed
   ipv4_address 172.30.32.2 on network ha). Network ha uses subnet
   172.30.32.0/24.
7. Write mosquitto/mosquitto.conf: listener 1883, allow_anonymous false,
   password_file /mosquitto/config/passwd, persistence true,
   persistence_location /mosquitto/data/.
8. STOP. Tell me to create the broker user myself:
   docker run --rm -it -v "$PWD/mosquitto:/mc" eclipse-mosquitto:2
   mosquitto_passwd -c /mc/passwd ha
   WAIT until I confirm.
9. Caddyfile: DOMAIN { reverse_proxy homeassistant:8123 }
10. docker compose up -d. Then STOP and tell me to open https://DOMAIN, create
    the owner account and enable 2FA (Profile > Security) myself. WAIT.
11. Add root cron for a nightly config archive that excludes *.db, *.db-* and
    logs: tar czf /root/homeassistant/ha-config-$(date +\%F).tar.gz
    --exclude='*.db' --exclude='*.db-*' --exclude='*.log*' config mosquitto
    from /root/homeassistant at 03:00.

RULES:
- Never print, cat or log .env, mosquitto/passwd, or anything under
  config/.storage. To check a value is set, check it is non-empty.
- Home Assistant and the broker must not be reachable from the internet.
  Ever. Do not change the 127.0.0.1 bind.
- Never create the owner account, the broker password or the 2FA secret.
- The ufw ordering is not optional.
- Do not use network_mode host or privileged. There is nothing to discover on
  a VPS.
- Nothing destructive. If ~/homeassistant exists, STOP and ask. Never delete
  the config directory.
- Do not add integrations, users or automations. That is mine to do.

VERIFY, AND SHOW ME THE OUTPUT OF EACH:
- "docker compose ps" -> homeassistant, mosquitto, caddy running
- "docker compose logs caddy | tail -20" -> certificate obtained
- "curl -sI https://DOMAIN" -> 200, or a redirect to the login page. A 400
  means trusted_proxies is wrong: report it, do not loosen the setting.
- THE NEGATIVE CONTROL, from MY machine: "curl -m 5 http://SERVER_IP:8123"
  -> MUST fail or time out. Same for port 1883. If either answers, stop.
- "docker compose exec mosquitto mosquitto_pub -h localhost -t t -m x"
  without credentials -> MUST be refused
- run the tar command once; "tar tzf" the result -> lists
  config/configuration.yaml
- reboot, wait 60 s, "docker compose ps" -> everything back

Do not tell me a step succeeded without showing the command output that proves
it. If a verification fails, stop and report the actual error. Do not retry
silently and do not improvise a workaround, especially around the firewall,
the port bindings or trusted_proxies.
Two things in that prompt are worth stealing. It never lets the agent create the owner account, broker password or 2FA secret, because the agent building your hub shouldn't hold its keys. And "400 means stop" exists because the fastest fix for a proxy error is trusting every address, which lets anyone spoof their client IP.
The WireGuard half is covered in setting up a WireGuard VPN server. The Docker, Caddy and automatic-HTTPS pattern is the one used for self-hosting n8n, and the passwords belong in Vaultwarden.
Deploy your VPS
A Home Assistant that's reachable from anywhere, talks to your cloud services and your home network, and is backed up off the box, without opening a single port on your home router.
The Orbit plan gives Home Assistant, the broker and the proxy comfortable headroom.
- Unmetered bandwidth, no overage
- Free DDoS protection
- Daily automated backups
- Browser console access
Common questions
Can I run Home Assistant on a VPS? Yes, as Home Assistant Container in Docker. It can't discover devices on your home network or drive USB radios from there.
Can it control my Zigbee or Z-Wave devices? Not directly. The USB radio has to be plugged into a machine at home. A common pattern is to keep the radio side at home and use the VPS for cloud services, MQTT and dashboards.
Why not Home Assistant OS? HAOS and Supervised expect to own the whole machine. Container is the supported route for a normal Linux VPS. You lose add-ons, so the broker runs as its own container.
Do I need WireGuard? Only for reaching devices at home. Cloud integrations and MQTT work without it, and it saves you opening a port on your home router.
Is it safe to expose Home Assistant to the internet? As safe as the setup: HTTPS only, two-factor login, 8123 bound to localhost, one trusted proxy, and updates applied.