Self-hosting Headscale gives you your own Tailscale-style mesh network with no account at a third party. Headscale is an open-source implementation of the Tailscale control server. Your devices still run the normal Tailscale clients, but they sign in to your server and get their keys and addresses from it. You'll run it in Docker behind Caddy for automatic HTTPS, connect devices with pre-auth keys, add a subnet route and an exit node, and set an access policy, in about 40 minutes.
Using an AI coding agent? There's a ready-made prompt at the end of this guide. Copy that instead of this article.
Headscale or plain WireGuard?
Both use WireGuard underneath, so the choice is about shape.
| Plain WireGuard | Headscale |
|---|---|
| One server, a handful of devices that connect to it | Many devices that should all reach each other |
| You edit a config file per peer | Devices register themselves and get an address |
| All traffic goes through the server | Devices connect directly when they can |
| Nothing to run except the tunnel | A control server to run and back up |
If you only want a private tunnel from your phone and laptop to one VPS, our WireGuard server guide is simpler and has fewer moving parts. If you have six machines across three networks and want to reach any of them by name, Headscale is the better tool.
What the control server actually does
The control server is the phone book, not the road. It stores each device's public key, hands out addresses from a private range, and tells devices how to find each other. Your actual traffic goes device to device. When two devices cannot reach each other directly, for example behind strict NAT, traffic goes through a relay called DERP. Relayed traffic stays encrypted end to end, but it is slower.
That is why the server is small, with state in a single SQLite database.
What you'll need
- A PrivateByte VPS. Flare ($5.99/mo: 1 vCPU, 2 GB RAM, 25 GB SSD) is enough. A control server for a personal mesh is light work. Choose Orbit ($7.99/mo: 2 vCPU, 4 GB RAM, 50 GB SSD) only if you plan to turn on the embedded relay for many devices.
- A domain name you control the DNS for.
- The Tailscale client on the devices you want to join (it is the standard client, from tailscale.com).
- About 40 minutes.
We use the container install. Headscale's own docs prefer the official .deb package on Ubuntu 22.04 and newer, and either route is fine. The container keeps Headscale and Caddy together in one compose file, so we use that here.
Step 1: Deploy your VPS
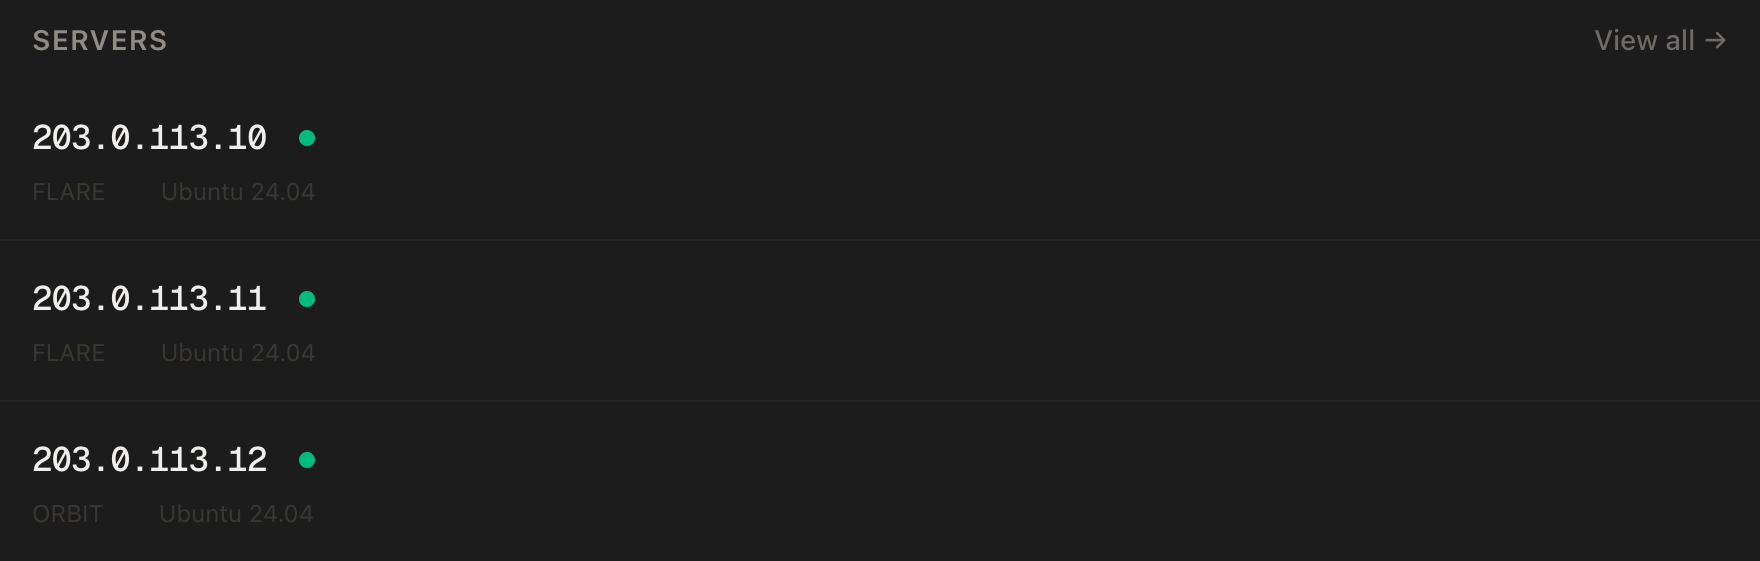
In the PrivateByte dashboard, open the store, choose Flare, pick Ubuntu 24.04, and deploy. Usually ready in a few minutes.
Step 2: Point a hostname at the server
Create one A record for the control server.
| Type | Name | Value |
|---|---|---|
| A | hs |
your server's IP |
dig +short hs.yourdomain.comThat must print your server's IP before you continue, or Caddy cannot get a certificate. MagicDNS later uses a different name (tailnet.yourdomain.com) that needs no public DNS record.
Step 3: Connect, firewall, Docker
Use the host, user and port from your dashboard.
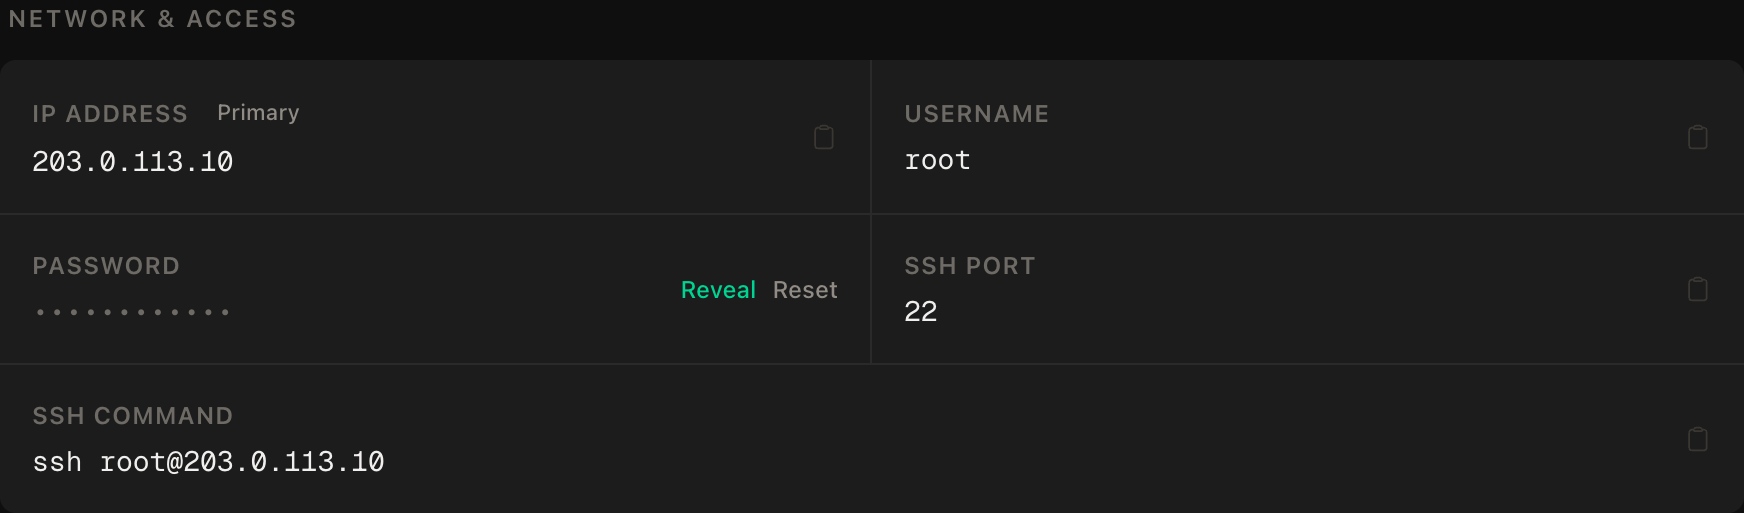
ssh root@YOUR_SERVER_IP
apt update && apt upgrade -y
ufw allow OpenSSH
ufw allow 80/tcp
ufw allow 443/tcp
ufw --force enable
curl -fsSL https://get.docker.com | sh
Allow SSH before enabling the firewall, or you lock yourself out. Port 3478/UDP stays closed while the embedded relay is off.
Step 4: The Headscale config
mkdir -p ~/headscale/{config,lib,caddy}
cd ~/headscale
echo 'HEADSCALE_VERSION=SET_ME' > .env
Find the latest release tag on the Headscale GitHub releases page and put it in .env in place of SET_ME, matching the tag format on Docker Hub. Pinning means updates happen when you choose.
Download the example config matching your version, since the docs warn to use the same tag:
. ./.env
curl -fsSL -o config/config.yaml \
  https://raw.githubusercontent.com/juanfont/headscale/v${HEADSCALE_VERSION}/config-example.yaml
Edit config/config.yaml. These are the keys that matter:
server_url: https://hs.yourdomain.com
listen_addr: 0.0.0.0:8080
metrics_listen_addr: 127.0.0.1:9090
noise:
  private_key_path: /var/lib/headscale/noise_private.key
prefixes:
  v4: 100.64.0.0/10
  v6: fd7a:115c:a1e0::/48
derp:
  server:
    enabled: false
  urls:
    - https://controlplane.tailscale.com/derpmap/default
database:
  type: sqlite
  sqlite:
    path: /var/lib/headscale/db.sqlite
dns:
  magic_dns: true
  base_domain: tailnet.yourdomain.com
What each one does:
server_urlis the address clients are told to use. It must be the public HTTPS name, because Caddy answers there.listen_addrdefaults to127.0.0.1:8080. Inside a container that would be unreachable by Caddy, so it becomes0.0.0.0:8080.prefixesare the private ranges devices get addresses from. The defaults suit most people.derp.urlspoints at Tailscale's public relay map by default. We keep it for now so relays exist.base_domainis the suffix for MagicDNS names, so a device calledlaptopbecomeslaptop.tailnet.yourdomain.com.
Validate the file first:
docker run --rm -v "$PWD/config:/etc/headscale:ro" \
  docker.io/headscale/headscale:${HEADSCALE_VERSION} configtest
Step 5: The compose file and Caddy
# docker-compose.yml
services:
  headscale:
    image: docker.io/headscale/headscale:${HEADSCALE_VERSION}
    container_name: headscale
    restart: unless-stopped
    read_only: true
    tmpfs:
      - /var/run/headscale
    volumes:
      - ./config:/etc/headscale:ro
      - ./lib:/var/lib/headscale
    command: serve
    healthcheck:
      test: ["CMD", "headscale", "health"]
    networks: [hs]

  caddy:
    image: caddy:2-alpine
    container_name: headscale-caddy
    restart: unless-stopped
    ports:
      - "80:80"
      - "443:443"
    volumes:
      - ./caddy/Caddyfile:/etc/caddy/Caddyfile:ro
      - caddy_data:/data
    networks: [hs]

networks:
  hs:

volumes:
  caddy_data:
# caddy/Caddyfile
hs.yourdomain.com {
reverse_proxy headscale:8080
}Caddy fetches and renews the certificate on its own, and it handles the WebSocket upgrades that Tailscale clients use without extra settings. Note that the Headscale project does not officially support Docker deployments or reverse proxies, and says so in its FAQ.
docker compose up -d
docker compose ps
curl -s https://hs.yourdomain.com/health
You should see both containers running and a healthy answer from the URL.
Step 6: Create a user and a pre-auth key
Headscale groups devices under users. Create one and read its numeric ID:
docker compose exec headscale headscale users create alice
docker compose exec headscale headscale users list
Now make a key. By default a pre-auth key is valid for one hour and works once. For adding a few devices over an afternoon, make it reusable with a short expiry:
docker compose exec headscale headscale preauthkeys create --user 1 --reusable --expiration 24hUse the ID from the list in place of 1. Treat the key like a password: anyone holding it can add a device until it expires.
Step 7: Connect your devices
On Linux, install Tailscale from tailscale.com, then:
sudo tailscale up --login-server https://hs.yourdomain.com --authkey YOUR_KEYOn macOS, run tailscale login --login-server https://hs.yourdomain.com, or use the Debug menu entry for a custom login server. For web-based sign-in instead of a key, a client prints a URL; approve it on the server with headscale auth register --user alice --auth-id ID. In older releases the command was nodes register, so check headscale --help for yours.
Phones need a little care. On iOS, open the account menu in the Tailscale app and choose Use custom coordination server. On Android, go to Settings, Accounts, open the three-dot menu and choose Use an alternate server, then enter your URL. The same menu offers Use an auth key. Menus move between app versions.
Confirm it worked:
docker compose exec headscale headscale nodes list
tailscale status
Each device gets an address in 100.64.0.0/10 and a MagicDNS name like laptop.tailnet.yourdomain.com.
Step 8: Subnet routes and an exit node
A subnet router lets the mesh reach a network where you cannot install Tailscale, such as a home LAN with a printer and a NAS. On a machine inside that network (not the VPS):
sudo tailscale set --advertise-routes=192.168.1.0/24Enable IP forwarding there too, per Tailscale's guide for your OS. An exit node sends all of a device's internet traffic out through that machine:
sudo tailscale set --advertise-exit-nodeAdvertising is not enough. Headscale will not use a route until you approve it:
docker compose exec headscale headscale nodes list-routes
docker compose exec headscale headscale nodes approve-routes --identifier 2 --routes 192.168.1.0/24
For an exit node, approve the exit routes in the same way. Clients opt in on their side:
sudo tailscale set --accept-routes
sudo tailscale set --exit-node HOSTNAME
Keep the exit node off the control server. The Headscale FAQ says running Headscale and Tailscale on the same machine is not supported. Use your home box or a second VPS. If that exit node is a Flare, remember its 100 Mbps uplink is the ceiling for traffic that goes through it.
Step 9: An access policy
With no policy loaded, Headscale lets every device reach every other. That is fine for one person, not once others join. Policies are written in a JSON-style file, referenced from policy.path in config.yaml. Headscale supports ACLs and the newer grants, and recommends grants because ACLs are legacy.
Keep rules small: tag servers, allow your user to reach them, let nothing else in. The policy also holds autoApprovers, which can approve routes and exit nodes for tagged devices automatically.
Reload without a restart:
docker compose kill -s HUP headscaleTest with two devices: one that should be blocked must fail, one that should be allowed must succeed.
Step 10: Optional relay on your own server
By default your devices use Tailscale's public relays when direct connections fail. To run your own, set derp.server.enabled: true and the public addresses in the config. The relay needs TCP 443, UDP 3478 for STUN, and TCP 80 for captive-portal checks. Open 3478/UDP in the firewall:
ufw allow 3478/udpThe Headscale docs do not cover the embedded relay behind a reverse proxy, so test carefully. Setting derp.urls: [] removes Tailscale's relays and makes your server a single point of failure. Most people should leave the defaults.
Step 11: Backups that matter
Your state is two files in lib/: db.sqlite, which holds users, nodes and keys, and noise_private.key, the server's identity. Lose the key and every client has to re-register.
cd ~/headscale
docker compose stop headscale
tar czf ~/headscale-backup-$(date +%F).tar.gz config lib
docker compose start headscale
Stopping briefly gives a consistent database copy. Copy the archive off the box and test a restore once. It contains secrets, so keep it private.
Step 12: Updates
Change HEADSCALE_VERSION, read the release notes, compare your config to the new example, back up, then:
docker compose pull
docker compose up -d
docker compose exec headscale headscale configtest
The honest limits
- No official Tailscale support. Headscale is an independent project. If a new Tailscale client feature breaks login, you wait for a Headscale fix.
- One tailnet. It is designed for one network, meant for a person, a lab or a small group. It is not a multi-tenant product.
- Scale. The project says it struggles with many frequently changing nodes.
- Relay fallback. If two devices cannot connect directly, traffic is relayed and slower.
- Mobile quirks. The custom-server menus are buried.
- You are the operator. Backups and updates are yours.
Verify it works
docker compose ps
curl -s https://hs.yourdomain.com/health
docker compose exec headscale headscale nodes list
tailscale status
tailscale ping laptop
tailscale netcheck
tailscale ping shows whether the path is direct or relayed. Reaching a device by its MagicDNS name proves DNS. Negative control: a device with no valid key must fail to register, and an unapproved route must be unreachable.
Troubleshooting
Caddy never gets a certificate. The A record is not pointing at the server yet, or ports 80 and 443 are blocked. Check dig and ufw status, then docker compose logs caddy.
A client says it cannot reach the server. server_url in the config must match the public HTTPS name exactly. Check curl https://hs.yourdomain.com/health from the client.
Registered but nothing connects. Check the policy file for a stray deny rule, remove it and reload.
A subnet route does nothing. It was advertised but not approved, the client is missing --accept-routes, or the router machine has IP forwarding off.
Phone will not take the URL. Use a pre-auth key and close any login prompt that appears first.
Everything is slow. Run tailscale ping to see whether the path is relayed.
Do it with an AI agent
Don't paste the article at Claude Code, Cursor or another agent: agents skim warnings and lose ordering. Copy this instead, and run it from your own machine with your agent able to SSH out.
Prompt for an AI agent
Set up Headscale in Docker on a fresh Ubuntu 24.04 VPS, behind Caddy for automatic HTTPS, with SQLite state kept in a volume.

FILL IN BEFORE YOU START:
- SERVER_IP    = <VPS IP from the PrivateByte dashboard>
- HS_DOMAIN    = <e.g. hs.example.com>
- BASE_DOMAIN  = <e.g. tailnet.example.com, NOT the same name as HS_DOMAIN>
- VERSION      = <the latest Headscale release tag, which I will confirm>
- Pre-auth keys are MINE to generate and hand out.

WHAT TO DO:
1. FIRST, "dig +short HS_DOMAIN" must return SERVER_IP. If not, STOP.
2. SSH to root@SERVER_IP. Confirm Ubuntu 24.04 and report "free -m".
3. apt update && apt upgrade -y. Firewall in THIS ORDER: ufw allow OpenSSH; ufw allow 80/tcp; ufw allow 443/tcp; ufw --force enable. Not 3478/udp.
4. Install Docker from https://get.docker.com.
5. mkdir -p ~/headscale/{config,lib,caddy}. Write .env with HEADSCALE_VERSION=VERSION.
6. Download config-example.yaml from the SAME tag as VERSION into config/config.yaml. Set server_url to https://HS_DOMAIN, listen_addr to 0.0.0.0:8080, dns.base_domain to BASE_DOMAIN, derp.server.enabled false. Leave prefixes, noise path and sqlite path at their defaults.
7. Run "headscale configtest" in the image against the config. If it fails, STOP and show me the error.
8. Write docker-compose.yml: headscale (docker.io/headscale/headscale:${HEADSCALE_VERSION}, read_only, tmpfs /var/run/headscale, ./config:/etc/headscale:ro, ./lib:/var/lib/headscale, command serve, healthcheck "headscale health", NO ports section) and caddy (caddy:2-alpine, 80/443, Caddyfile read-only, caddy_data volume), on one shared network.
9. Caddyfile: HS_DOMAIN { reverse_proxy headscale:8080 }
10. docker compose up -d. Then create ONE user named by me: docker compose exec headscale headscale users create NAME. List users and show the ID.
11. STOP. Tell me to create pre-auth keys myself with: docker compose exec headscale headscale preauthkeys create --user ID --reusable --expiration 24h. WAIT until I confirm a device is connected.
12. Add a root cron at 03:00 that stops headscale, tars config and lib from ~/headscale, starts headscale again.

RULES:
- Never print, cat or log any pre-auth key, config/config.yaml secrets, lib/noise_private.key or lib/db.sqlite.
- Do not publish the Headscale port. Only Caddy faces the internet.
- Never create pre-auth keys or approve nodes or routes. That is mine.
- The ufw ordering is not optional.
- Do not install Tailscale on this server, and do not make it an exit node or subnet router. Headscale and Tailscale on one machine is unsupported.
- Do not enable the embedded DERP, set derp.urls to empty, or write a policy file unless I ask.
- Nothing destructive. If ~/headscale exists, STOP and ask. Never delete lib/.

VERIFY, AND SHOW ME THE OUTPUT OF EACH:
- "docker compose ps" -> headscale healthy, caddy running
- "docker compose logs caddy | tail -20" -> certificate obtained
- "curl -s https://HS_DOMAIN/health" -> healthy answer
- THE NEGATIVE CONTROL, from MY machine: "curl -m 5 http://SERVER_IP:8080" -> MUST fail or time out. If it answers, stop.
- "docker compose exec headscale headscale users list" -> shows the user
- run the backup commands once; "tar tzf" the result -> lists lib/db.sqlite and lib/noise_private.key
- reboot, wait 60 s, "docker compose ps" -> both back

Do not tell me a step succeeded without showing the command output that proves it. If a verification fails, stop and report the actual error. Do not retry silently and do not improvise a workaround, especially around the firewall or port bindings.
Deploy your VPS
A private mesh for your own devices, with names that work, routes into your home network, and no third-party account holding the keys.
The Flare plan is plenty for a Headscale control server and Caddy.
- Unmetered bandwidth, no overage
- Free DDoS protection
- Daily automated backups
- Browser console access
Common questions
What is Headscale?
An open-source, self-hosted Tailscale control server. Clients point at it with --login-server. It serves a single tailnet.
Do I need Tailscale's service to use it? No. Clients sign in to your server. By default devices can still use Tailscale's public relay servers when a direct path fails, unless you run your own or remove them.
Can Headscale and Tailscale run on the same machine? Not supported, according to the Headscale FAQ. Keep the control server on its own VPS and put exit nodes and subnet routers on other machines.
Is Headscale better than plain WireGuard? For one server and a few devices, plain WireGuard is simpler. For a mesh, Headscale saves editing a config per peer.
What do I back up?
The SQLite database db.sqlite and noise_private.key in the lib directory, plus your config. Keep copies off the server, and treat them as secrets.
Why does my subnet route or exit node do nothing?
Headscale requires you to approve advertised routes, using headscale nodes approve-routes, unless a policy auto-approves them. Clients also need --accept-routes or --exit-node.